



Macro control mappings and Mapping Browser in Ableton Live

With
Isaac CotecHow to use Ableton's Mapping Browser to assign MIDI controllers, computer keys and Macro controls to your instruments and clips.
What's in the course
17 lessons (1h 33m) · 1 free
Lesson transcript
MIDI Mapping with Ableton Live
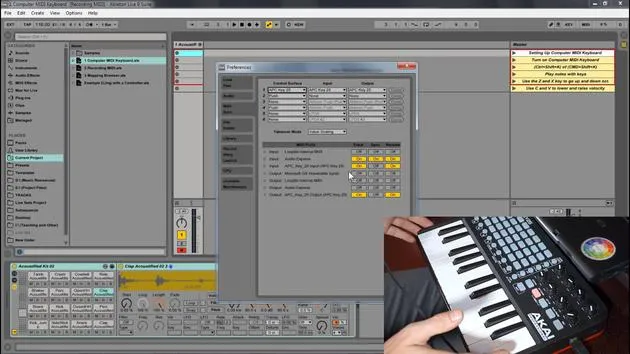
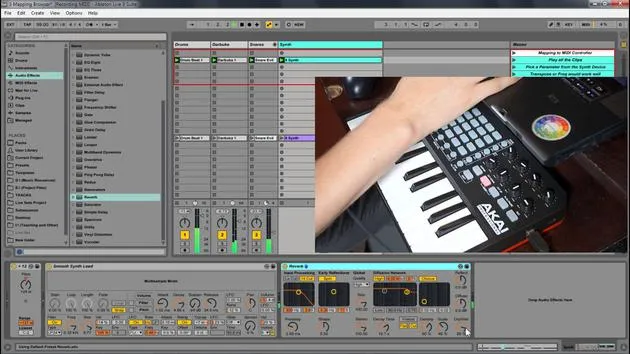
So now let's look at the mapping browser. MIDI mapping with Ableton Live is super easy. With the mapping browser, Live lets you:
- Map parameters to a MIDI controller
- Map to macros
- Map to a computer keyboard
This is a powerful way to set min and max values to a knob or trigger certain clips with a keystroke.
(Replace with actual image URL)
We can also enter the mapping browser with the MIDI map mode switch and the key map mode switch. Let's look at that within Ableton Live.
Automation and Modulation
Now, let's say I have an instrument and I want to create automation or modulation to it. I want to record it or do different effects, and I might want to use an external controller for that. For me, it would be just a lot more playable than coming in here, finding the parameter, and clicking it to move it live.
Step-by-Step Mapping Process
-
Select MIDI Map Mode: Let's say I'm playing this, and we have this filter sweeping that we can do. If I want to map that to a controller:
- Hit MIDI.
- Click whatever I want and move a control.
-
Control Identification: The second I do that, you'll see a number indicating what this control is. Moving different controls will give different numbers, shown in the mapping browser.
-
Mapping Browser Overview:
- You will see:
- The parameter note or control number
- What it's affecting
- The min/max values
- You will see:
Adjusting the Range
Let's see what that looks like:
- Right now, if I adjust, it goes all the way down and all the way up. But there might be a scenario where I don't want such a wide range.
For example:
- If I put in a reverb, which is usually very big, I might not want it to go all the way wet.
By entering MIDI Map Mode:
- I can see the controller number, which is going to the synth reverb, and its dry/wet mix.
Currently:
- If I move this, it goes all the way wet and all the way dry.
Changing Min/Max Values
In the MIDI map browser, I can change this range.
- Let's set it to:
- Minimum: 10%
- Maximum: 50%
Now, when I move that knob:
- The range will go from 10 to 50.
I've effectively shrunk my range to what I really want to use. That min/max feature is huge.
Multi-Parameter Mapping
You can map all sorts of things. In MIDI map mode, you can map any parameter that is shown in blue. For example, I can map the spread and also map multiple things to the same knob:
- Spread
- Decay time to a second knob
- Pan
- Resonance, etc.
This is where the range adjustments come in handy, allowing me to dial in the specific effects.
Clips and Key Mapping
In the blue MIDI map mode:
- You can also map clips to specific keys. Just press the key, and you can set various clips to correspond to it.
Now, stopping all playback will record a new clip and bring in that snare darbuka and drum.
You're not just limited to adding effects; you can map pretty much anything you want!
Key Mapping in Detail
Key mapping is very similar, but it focuses on the keyboard.
- For example, I can map this to the ASDF keys.
- While mapping different controls through key mapping:
- Each key acts as an on/off button.
The general use for the keyboard would be to:
- Start and stop clips
- Record something on the fly
Summary of MIDI and Key Mapping Modes
In summary, we've explored:
- MIDI Map Mode: Useful for controlling sound and effects.
- Key Map Mode: Limited to on/off controls for easier clip management.
Now you have control over your MIDI by being able to record and add new parts, either by writing them on your computer keyboard or using an external MIDI device. We've learned how to set up all the different parameters found within the mapping browser, giving you everything you need to get started recording MIDI.
17 lessons
1h 33m of structured video lessons
Advanced video features
Slow down, loop a passage, follow along
Mobile, tablet & desktop
Practise wherever you are
100% satisfaction guarantee
30-day money-back guarantee
Meet your guru
Meet your guru
Isaac Cotec is, arguably, one of the best Ableton trainers in the world! While working on his own music, he began teaching recording techniques, sound design, and Ableton Live to private students, and since earning his certification as an official Ableton Certified Trainer he has helped thousands of producers step up their game and succeed as musicians.
Isaac started producing electronic music in 2005 with Psyche Sonics, an experimental group working with the science and research of binaural beats and altering consciousness through sound. After touring, he continued writing music under the alias Cotec and later emerged as the artist Subaqueous, blending his electronic past with both future and organic production techniques. To date, he has released 3 albums and 4 EPs.
Isaac is also the founder and manager of the record label Invibe Music, which represents some of the Pacific Northwest's best electronic music and specialises in midtempo dance music.
In his Ableton Live courses, Isaac shares the production, sound design and songwriting techniques he has spent years refining - the very skills he uses to turn a spark of an idea into a finished track.







