



Efectos MIDI y modificación de datos MIDI

Con
Isaac CotecIsaac muestra cómo los efectos MIDI de Live, como el arpegiador, transforman tus datos MIDI antes de que lleguen al instrumento, todo de forma no destructiva.
Qué incluye el curso
17 lecciones (1h 33m) · 1 gratis
Transcripción de la lección
Exploring MIDI Effects in Ableton Live
So that is the grid within Ableton Live. Now let's look at adding MIDI effects.
What Are MIDI Effects?
MIDI effects can change the incoming MIDI before it reaches the instrument.
- If you hold a single note, you can add a MIDI effect to:
- Arpeggiate the note
- Apply various transformations to the note information
This process is non-destructive. In other words, it does not change the note; it just changes what Live does with it. You can always go back and change this parameter later.
Demonstrating MIDI Effects
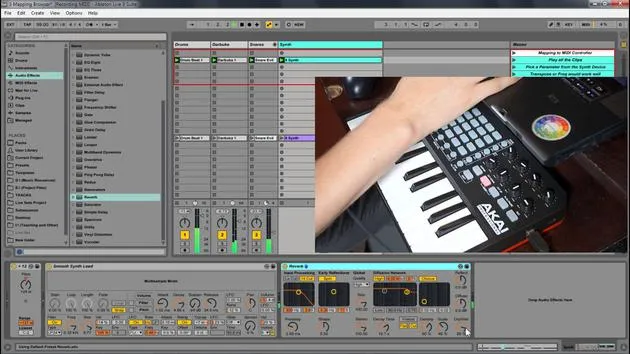
Let's use this controller as a visual way of showcasing the MIDI effects.
-
Access MIDI Effects:
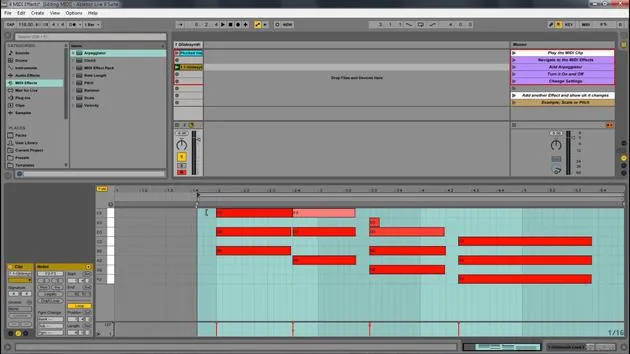
- Go into the MIDI effects section in the browser.
- Select Arpeggiator.
-
Initial Playthrough:
- First of all, I'm just going to play a note. When I hold it, it plays all the way through.
-
Positioning the Arpeggiator:
- Let's put our arpeggiator before the synth.
- The Arpeggiator acts as an intermediary between pressing a note and the actual sound output.
- It takes the MIDI information and changes those parameters to output new information for the synth.
This can be a great way to create interesting arpeggios!
Recording and Quantizing
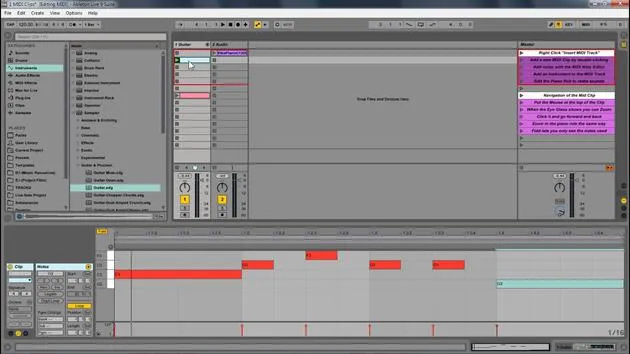
If I press record, you'll notice that I have the MIDI here, but it isn't showing all that arpeggiation and movement.
- What this means is I will quickly select this and quantize it.
- Just like we can quantize audio, we can right-click and quantize MIDI.
Now I'm going to move these things around just to enhance the example. Since those original notes are there, I can come in here and change the parameters:
- Change the rate
- Experiment with swing
Non-destructive Editing
Now, that's a completely different Arpeggiator. If I come over here to view the notes, you'll notice they're exactly the same. This showcases the non-destructive nature of MIDI effects.
Exploring Additional MIDI Effects
With the same concept in mind, let's quickly look at some other MIDI effects:
-
Note Length: Affects the length of the note.
-
Randomizer:
- Let's turn off the Arpeggiator and select these notes.
- The notes that play are not the same notes; they simply randomize whenever a note is triggered.
-
Pitch Shift:
- We can lower and raise the pitch. For example, if a note is a C, a shift of +12 will put it up an octave.
-
Scale:
-
Dragging in Scale allows you to specify where the notes fit.
-
Let's speed this up now. Opening the scale, I can choose different options.
-
For instance, putting it in blue scale. This takes all incoming notes and constrains them to fit that scale.
-
There are no wrong notes outside of this scale. Traditionally, sequences go like this: B note → A note → B → C, and so on.
-
But when I apply the scale, it adjusts those notes, ensuring they stay within the dictated scale parameters.
-
Conclusion
You can see how we can:
- Change out the MIDI effects
- Delete them
- Tweak the parameters
All while keeping the original MIDI intact. The MIDI information gets processed through these effects and is then sent to your instrument.
17 lecciones
1h 33m de lecciones en vídeo estructuradas
Funciones de vídeo avanzadas
Ralentiza, repite un pasaje, sigue la partitura
Móvil, tablet y ordenador
Practica donde quieras
Garantía de satisfacción 100%
30 días de garantía de devolución
Conoce a tu gurú
Conoce a tu gurú
Isaac Cotec es, posiblemente, ¡uno de los mejores formadores de Ableton del mundo! Mientras trabajaba en su propia música, empezó a enseñar técnicas de grabación, diseño sonoro y Ableton Live a alumnos particulares y, desde que obtuvo su certificación como Ableton Certified Trainer oficial, ha ayudado a miles de productores a mejorar su nivel y triunfar como músicos.
Isaac comenzó a producir música electrónica en 2005 con Psyche Sonics, un grupo experimental que trabajaba con la ciencia y la investigación de los binaural beats y la alteración de la consciencia a través del sonido. Tras salir de gira, siguió componiendo música bajo el alias Cotec y más tarde surgió como el artista Subaqueous, fusionando su pasado electrónico con técnicas de producción tanto futuristas como orgánicas. Hasta la fecha ha publicado 3 álbumes y 4 EPs.
Isaac es también fundador y gerente del sello discográfico Invibe Music, que representa a algunos de los mejores artistas de música electrónica del Pacífico Noroeste y se especializa en dance de midtempo.
En sus cursos de Ableton Live, Isaac comparte las técnicas de producción, diseño sonoro y composición que ha pasado años perfeccionando: justo las habilidades que emplea para convertir la chispa de una idea en un tema terminado.







