



Mixing the track: effects

With
John WatsonMix your track in Ableton Live so every element sits together, working through EQ Eight, reverb, compression and the Glue compressor - starting with the kick.
What's in the course
14 lessons (2h 26m) · 2 free
01. Getting started & setup
3:21
02. Managing a sample library
Free lesson4:34
03. Ableton preferences
1:14
04. Using samples: Simpler and Sampler devices
7:04
05. Using samples in your track (trim, stretch, tune, EQ)
12:56
06. Adding sampled strings and flutes
7:28
07. Adding sampled rhythm: kicks and snares
25:07
08. Sampling external intsruments - drum machine & synth
12:28
09. Building the parts in Session view
13:55
10. Recording the song into Arrange view
4:34
11. Fine tuning track structure
5:35
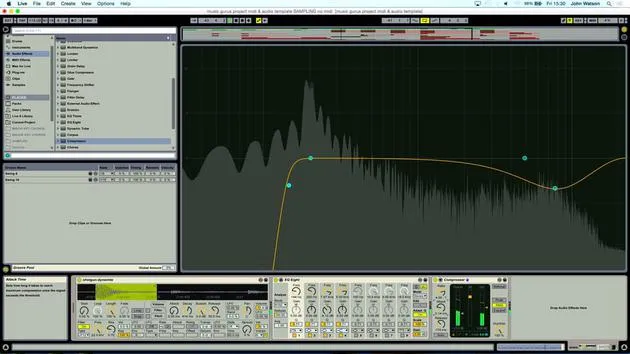
12. Mixing the track: effects
You are here21:24
13. Final adjustments
13:14
14. BONUS: Mastering your track & uploading to Soundcloud
Free lesson13:31
Lesson transcript
Mixing the Track: Step-by-Step Guide
Welcome back! I'm happy with the structure now, and I feel it's time to mix the track to make all these elements really stand out in their own right and for the track to sit better together as one piece. I might make a few adjustments to the structure as I go along, but, like I say, I'm pretty happy.
Starting with the Kick Drum
The first thing I'm going to do is come over to the drums and start with the kick. It's always a good place to start when mixing.
-
Kick Drum Setup
Here's my kick drum. I'll zoom in a little bit to tidy this up on the simpler here. This ensures that the kick really snaps to the grid by aligning the start of the sample hit point. -
Make it Mono
The next thing I'm going to do is make the kick mono. It will come straight down the center of the mix, which is a good place for a kick drum to sit, along with the snare.- Action: Put the utility device on and bring it to mono.
-
Adding EQ
Now, I'll pop on some EQ and give it a little shape. Double-click this to see it a bit bigger.- Frequency Adjustments:
- Take a little bit of a low frequency out using a low cut.
- Do a little boost to the low frequency end, maybe around 60 Hz.
This band here is a bell curve. I can boost or cut specific frequencies with this band. I want to give a little more low end to the kick by adding a bit more bass frequency.
- Frequency Adjustments:
-
Compression
I'm going to pop on some compression here. The trick is to make the kick drum a little punchier.- Settings:
- Adjust the strength
- Set the ratio
- Slow down the attack
- Take off the auto makeup
- Lower the threshold
I've reduced the volume even though it's a bit more aggressive, so I need to make up for that by adding maybe 6 dB.
- Settings:
Snare Drum Adjustments
Now, I'm pretty happy with the kick. Next, I'll work on the snare.
-
Snare Drum Setup
Coming out of the simpler device, I'm going to grab my EQ to give it a better shape.- Frequency Adjustments:
- Take a little bit of the high frequency out
- Remove some lows
Let's grab a compressor and increase the ratio. I'll lower the threshold and adjust the attack so the compression happens a little quicker. That sounds good!
- Frequency Adjustments:
Adding Effects
I want to add a little reverb to the snare, and I like to do this with a send-return configuration.
-
Create a Return Track
- Go to Create -> Insert Return Track. This is an auxiliary track where I can route a certain sound to this track that has an effect on it.
-
Insert Reverb
- Put in a reverb here and ensure the effect is on 100% wet.
- Send the signal to this track. Check Solo In Place to hear the reverb coming through.
Working on Percussion
Next, I'll come over to the percussion track:
-
Percussion Track Setup
Loop up a little section and solo it. I'll throw on my trusty EQ.- Frequency Adjustments:
- Trim away high frequency energy that sounds a bit bright.
- Remove unwanted low frequency energy.
- Frequency Adjustments:
-
Using the Glue Compressor
I'm going to grab the Glue Compressor to compress multiple drums together.- Lower the threshold and adjust as needed.
More Reverb and Effects
Now, I'll get another return track for a different type of reverb. I'll label this one a medium reverb and load it up.
-
Using Reverb on Shakers
For the shakers, I'll use my EQ8 again to visualize and effectively cut unwanted low frequency energy and some high frequencies to smooth them out. -
Compressing Shakers
I'll copy over the glue compressor settings from the percussion track and drag it onto the shaker track.
Crash Cymbal and Brush Drums
-
Crash Cymbal Setup
Again, I'll use EQ to cut low frequency energy and brighten it up with a high shelf to enhance high frequency energy.- Add medium reverb after making adjustments.
-
Brush Drums Setup
I'll check the brush drums. The sample leans to the right-hand side, so I'll pan it to the left to balance it out. I need to trim some low and high frequencies there as well. -
Compression for Brush Drums
Similar to the snare compression, I'll copy those settings over.
Grouping Drums
I want to get all of the drums going to one place to group them.
-
Grouping Tracks
Using Shift, select all different drums, including the crash cymbal, and right-click to group tracks. -
Apply Compression to the Group
Use the Glue Compressor on the group track to help everything sit together.
Final Adjustments
I noticed another sample under the drums that needs attention.
- Last Sample Adjustments
Use EQ8 to remove any bass notes and fine-tune using the fine-tuning feature in the simpler device.
Focusing on Musical Elements
Next up, I'll mute my drums and focus on the hang drum.
-
Hang Drum Processing
I'll start with EQ to cut low frequencies and adjust for resonance.- Compression: Use the Glue Compressor to even out the sound.
-
Adding Reverb
Three different types of reverb will be added: small, medium, and large.
Bass Line Improvements
Lastly, I think the bass line needs some improvements.
-
EQ for Bass
Put in some EQ to cut extra low end and mid-range frequencies for clarity. -
Saturation
Add Ableton Saturator in soft sign mode for a tape-like saturation effect. -
Final Compression
Add compression to refine the bass sound.
With these steps, I believe the track will come together beautifully! Happy mixing!
14 lessons
2h 26m of structured video lessons
Advanced video features
Slow down, loop a passage, follow along
Mobile, tablet & desktop
Practise wherever you are
100% satisfaction guarantee
30-day money-back guarantee
Meet your guru
Meet your guru
After work experience with Depeche Mode and The Cure producer Dave Allen, John was inspired to study Music Technology in London. His music career took off after a successful signing to CookShop Records, releasing 9 singles and an album in 2007 that received rave reviews from Q, Uncut and Lowdown Magazine, plus radio play from XFM and Radio One.
John began training as an audio engineer at Bonafide studio in 2005, where he refined his talents, and later that year set up Jackdaw Recordings. He has collaborated with many successful artists, and in 2007 began playing for pop musician Patrick Wolf, performing at leading venues here in the UK and internationally - including The Astoria and Shepherds Bush Empire.
Based in his London studio, John now writes music, with two more releases on CookShop, does sound engineering for prominent artists, and creates sound design for TV ads, film, theatre and corporate video.
That rare mix of songwriter, producer and working studio engineer is exactly what John brings to his teaching. In Creative Composition & Production in Ableton Live and Creative Sampling & Production in Ableton Live, he shows you how he turns raw ideas into finished, release-ready tracks - the writing, the sampling, the sound design and the hands-on engineering know-how behind a professional record.







