



Mappage MIDI, racks & macros (partie 1)

Lesson time: (4min 33sec)
Course preview
This lesson is part of the course Comment créer un live d'enfer avec Ableton Live et des instruments externes
Watch a preview of the full course below.
Lesson transcript:
Understanding Mapping in Live
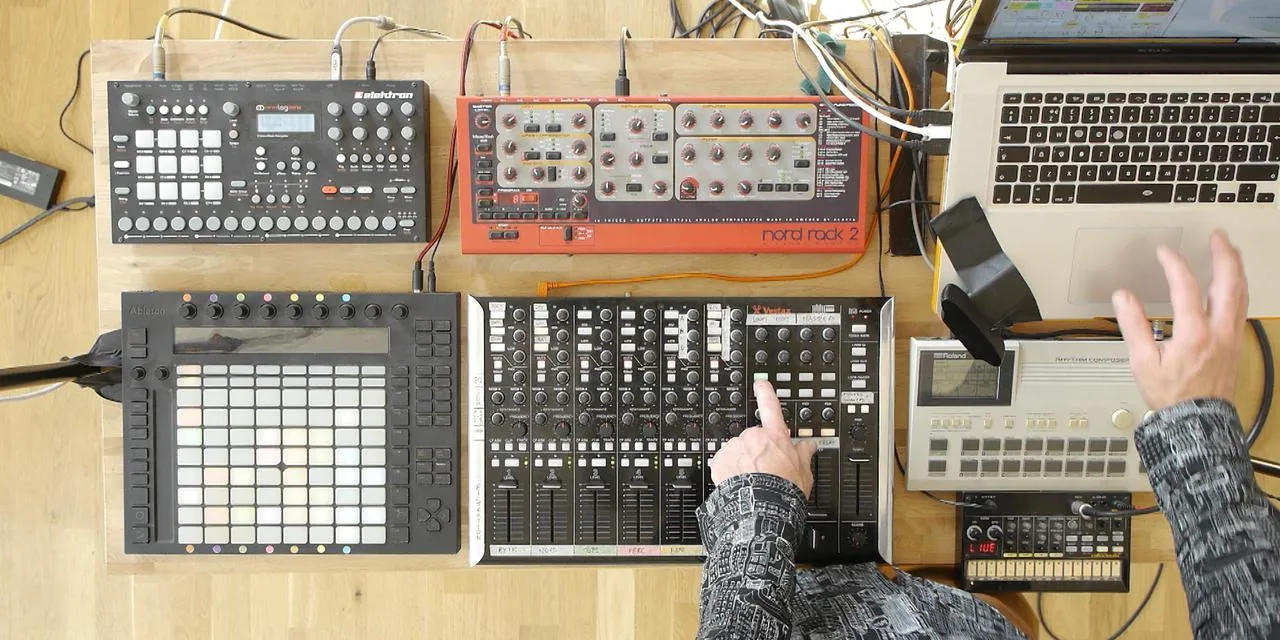
Okay, so what you've noticed quite a bit during the earlier videos is that I'm controlling a lot of what's happening in Live using the Vestax VCM here, and occasionally the Ableton Push over here. But most of the stuff's happening here.
I've shown you how what's happening on screen relates in some degree to what's happening here. Now, this relationship is all defined and dictated by what's known as mapping.
What is Mapping?
I've obviously made some brief references to it before, but what I'm going to do now is go through exactly what mapping is and show you the mapping I've got set up within this particular set that's enabling me to control all of these various parameters inside the Live set.
It's a little daunting because there's a lot of mapping that has gone on to create this performance environment. However, how controllers are mapped is very critical.
Imagine how a musician interacts with their instrument. You become really familiar with it. For example, in learning guitar, you familiarize yourself with the finger positions and the different strumming techniques. The combination of this familiarity allows you to perform fluidly or even ad-lib.
The Objective of Mapping
That's very much the objective I set when putting this particular performance piece together. I've looked at this as a mixing environment and tried to define these controls within the software in a way that's intuitive for me.
It's crucial that the mapping is intuitive to you because, although you may think that some of my setups are great, if the assignment of various controls isn't intuitive for you, you'll find yourself thinking about which knobs, buttons, and faders to manipulate during a performance. This is counterproductive.
The goal is to develop an environment where you instinctively know where to go on that controller to achieve a particular audio output or specific aspect of a performance.
Accessing Mapping Preferences
Now, I'm going to go into the mapping preferences in Live. There are a couple of ways to do that:
- You can either hit Control M or Command M on a Mac.
- Alternatively, you can go to the top right corner and click the button labeled MIDI.
As soon as I click on that MIDI button, you'll notice that most of the screen takes on a bluish hue. If I go to the very left of the screen, you'll also see a bunch of little white boxes with alphanumerics and numerical characters. These indicate which parameters on screen have mappings assigned to them.
Viewing Mappings
If I open the information on the left, it will show me all of the mappings I've made for this particular project. As I scroll down through this extensive list, each entry represents a control on the VCM mapped to a parameter within the Live set.
Initially, this can appear quite confusing, but the essence is understanding that I've chosen specific controls that intuitively feel like they should perform specific tasks within the mix environment.
Key Examples
Instead of going through each entry in detail, I'll pick a few key examples to explain how they were set up and why they have their specific parameters outlined:
-
MIDI Channels: This relates to MIDI channels, each having a maximum of 16 channels, which can be thought of as different signal paths to send messages to different instruments.
-
Control Value: This tells me which control it is on the device I'm using, utilizing generic MIDI control numbers and note numbers.
- For example, CC means continuous controller, as in knobs or faders with a range.
- Further down the list, you'll see notes, which could be keyboard notes used for triggering actions within DAWs like Ableton Live.
Navigating the Track Assignments
Using a simple example, if I look at the NORD track, there's assignment 2, which means MIDI channel 2 and note G3. Whenever I press that, it correlates to a specific track in Live.
- Pressing the button that says "track" on the VCM jumps to that track, displaying its contents.
- The next button will map to track three, illustrating how track activator buttons are hardwired to output different MIDI notes.
Setting Control Ranges
Moving to continuous controls, I can assign faders and knobs depending on their movements. At the bottom of the NORD track, the volume for this track is MIDI Track 2 and CC number 22.
I've set this up so that the volume only moves within a constrained range because I've prepared my audio clips and levels to be close where they need to be. Even though music may need slight adjustments during performance, this setup is efficient.
To alter the mapping range:
- Enter MIDI map mode (Control M or Command M).
- Click on the volume fader and delete its mapping.
- When I turn the knob again, it will remap automatically.
- I can then set the minimum to -18 and maximum to -6.
Now, when I adjust the fader, it operates within a safer, constrained range, minimizing large accidental changes.
Conclusion
In summary, the choice of knobs for volume rather than faders allows for more controlled adjustments, preventing dramatic changes during live performances. By keeping everything intuitive, I ensure performance remains fluid and effective.
About the instructor
Mark Burnett est un Ableton Certified Trainer qui travaille avec les produits Ableton depuis plus de 14 ans. En tant que producteur et DJ chez Funk'n Deep Records, ses morceaux ont été joués dans de grands festivals ainsi que dans les sets et podcasts d'artistes comme Carl Cox et Richie Hawtin, et il s'est produit devant des foules de plusieurs milliers de personnes. Il organise également des événements de grande envergure comme le Workhouse Project, et a étudié à l'Imperial College London. Son cours porte sur l'utilisation d'Ableton Live pour construire des performances en direct, et convient aux producteurs et interprètes de musique électronique qui souhaitent faire passer leur spectacle du studio à la scène. read more