



Moll-Pentatonik 2
Lesson time: (7min 58sec)
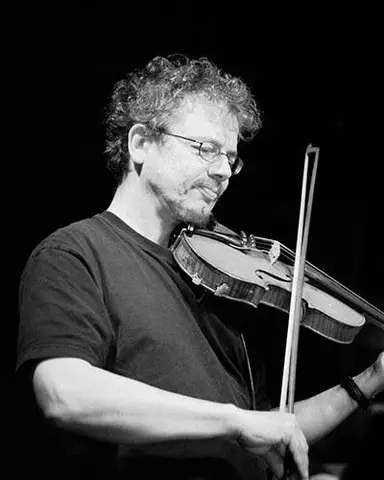
Chris Haigh erweitert die a-Moll-Pentatonik in höhere Lagen auf der Geige und ersetzt leere Saiten durch neue Fingersätze, einschließlich des vierten Fingers.
© 2011 Schott Music Ltd, London
Course preview
This lesson is part of the course Rock-Violine: Grundlagen
Watch a preview of the full course below.
Lesson transcript:
Minor Pentatonic Lesson
Hi! In this lesson, we're going to continue with the minor pentatonic, and this time we're going to use different fingerings and take it up into higher positions.
A Minor Pentatonic in First Position
The A minor pentatonic in first position using open strings looks and sounds like this.
- Open strings: A lot of open strings are used here.
Now, let's do the same thing using our fourth fingers instead of open strings. I know that everybody's fourth finger is their least favorite, but there's a good reason for using it.
Fingering Exercise
Looking at the fingering, we have:
1, 3, 4,
1, 3, 4,
2, 3, 4,
2, 3.
I want you to start thinking about finger patterns or finger shapes as well as just notes.
Advantages of the Fourth Finger
What's the point of using the fourth finger?
The advantage of doing that is that, by eliminating the open strings, we can now use the same finger pattern for any different key.
Example:
- Let's say we're going to do the B flat minor pentatonic.
- Try doing that in first position ? it's pretty hard.
- Now, do it in third position by replacing the second finger with the first finger.
We can now use exactly the same finger pattern:
1, 3, 4,
1, 3, 4,
2, 3, 4,
2, 3.
So B flat has now become as easy as A, or indeed any other key, because we're using exactly the same fingers.
Key Placement and Tuning
The important thing is to get your first finger in the right place on the new tonic and keep it there, making sure it's in tune.
Now, if we just use that fingering, there may be some extra notes that we might be missing. Let's explore this further.
Finding Extra Notes
We're going to start in F this time:
1, 3, 4,
1, 3, 4,
2, 3, 4.
Now, there are some notes missing on the string, so let's address that:
Adding Notes:
- Use 4, 2, 4.
I'll do it again, and for the purpose of making the scale sound satisfactory, we'll always end on the root.
Practice in Different Keys
And that, unsurprisingly, is something I'm going to ask you to learn in a whole lot of different keys.
Let's move to the D minor pentatonic. So far, we've used the same set of fingerings, which is a great place to start for your next few weeks or maybe even six months.
Exploring Different Positions
Eventually, you're going to want to play in a variety of keys. Let's try the D minor pentatonic, starting in four different places:
-
Fourth Position:
Start with your first finger.
1, 3, 4,
1, 3, 4. -
Third Position:
Start with your second finger.
2, 4, 1. -
Third Finger Start:
Start on the third finger.
3, 1, 2, 3. -
Fourth Finger Start:
Finally, start on the fourth finger.
In the long run, you want to be able to start the pentatonic pattern with any finger and follow it up and down with different fingerings.
Long-Term Technique
I admit that this isn't something I regularly do, but if you're in this for the long term, I recommend that you learn the more challenging method of starting on any finger.
Descending Lick in E Minor
Let's follow that idea further with a descending lick in the key of E minor:
- Start with the first finger on that B (the first note), then:
- Second finger,
- Third finger,
- Fourth finger.
This is a bit of work, but it's worth it in the long run.
Final Exercise: Three Octaves
Now we're going to finish off this lesson with a real challenge. This will use the first finger as the beginning of each pattern again, but we're going to do it in three different octaves.
- Start by ending on the fourth finger.
- Replace that fourth finger with the first and do the same finger pattern again.
- Replace that fourth finger once more.
You'll see that with the same finger pattern, we've covered the whole length of the neck.
Understanding Patterns, Not Notes
As soon as we get out of first position, you don't need to know what notes you're playing, because the pattern takes care of it.
I have absolutely no idea what those notes up there are, but because I got there by a safe route, I know they were the good notes.
Assignment
For this lesson, your assignment is to practice all of the pentatonic patterns we've gone over.
- Go back to the previous chapter and try doing all of those, not just in first position, but in third position or even higher.
- Finally, using the backing track "Rutzy Blues" that we just played, try improvising on the minor pentatonic in higher positions.

About the instructor
Chris Haigh ist seit 25 Jahren professioneller Fiddle-Spieler mit Erfahrung in vielen verschiedenen Genres. Er hat auf über 75 Alben gespielt und dabei mit Künstlern wie Alison Moyet, Bob Geldof, All About Eve, Michael Ball, David Soul, Oumou Sangare, The Quireboys, Riverdance, Morcheeba, James Galway und Steps zusammengearbeitet. Er hat Swing-Jazz mit The Kimbara Brothers, Diz Disley, Le Jazz, The Hot Club of London und den Quecumbar Allstars gespielt und leitet die siebenköpfige sowjetische Swing-Band The Kremlinaires. Chris gibt Unterricht und Workshops zur Jazzgeigen-Technik und hat Jazzgeige an den Universitäten Middlesex, Brunel und Newcastle sowie am Truro College unterrichtet. Zu seinen Veröffentlichungen zählen neun Fiddle-Bücher, darunter The Fiddle Handbook. Außerdem betreibt er Fiddling Around (fiddlingaround.co.uk), vermutlich die umfassendste und meistbesuchte Quelle für Fiddle-Wissen im Netz. read more