



Mode performance d'Alchemy
Avec
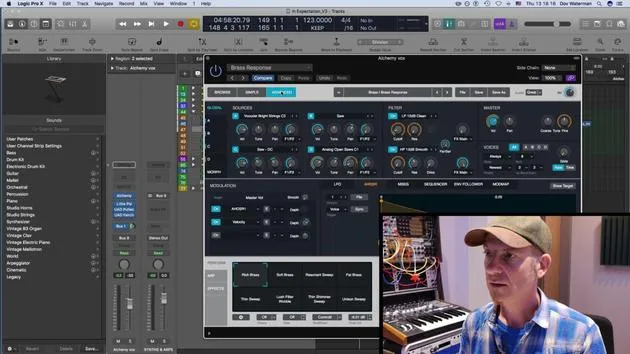
Dov WatermanDov Waterman fait la démonstration du mode performance d'Alchemy : amener un extrait audio de ton morceau dans le sampler et le façonner avec des snapshots pour créer un son unique.
Le contenu du cours
14 leçons (1h 19min) · 1 gratuites
01. Introduction à la synthèse dans Logic Pro
0:47
02. Introduction à Alchemy
4:27
03. Flux du signal et effets d'Alchemy
8:59
04. Modulation dans Alchemy
Leçon gratuite5:49
05. Importer de l'audio pour l'échantillonnage
6:24
06. Mode performance d'Alchemy
Tu es ici10:13
07. DÉFI N°1 : CRÉE UN SYNTHÉ GRANULAIRE
1:29
01. Introduction à la programmation des rythmes et des beats
1:18
02. Introduction à Ultrabeat
7:56
03. Ultrabeat en tant qu'instrument multi-sorties
5:53
04. Introduction à Virtual Drummer
9:27
05. Virtual Drummer - effets avancés et superposition
11:18
06. Introduction aux Apple Loops
4:40
07. EXERCICE : Drum Machine Designer
1:07
Transcription de la leçon
Understanding Performance Mode in Alchemy
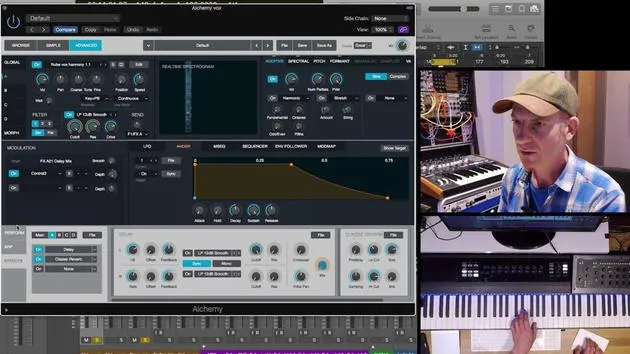
So, the performance mode in Alchemy is where it becomes a very unique instrument. Apart from being able to add your own audio, if you're working on a specific piece of music, you can make it really individual. You can create something that is not going to be heard by anyone else by taking a snippet of, perhaps, something within the track, such as a vocal recording, and bringing it into Alchemy.
This allows you to affect that audio, making it very unique to both your track and yourself, thus creating a unique sound of yourself.
Working with Snapshots
I brought in this snippet we've looked at before. This performance mode features snapshots of various modulations of parameters that you can use.
Saving Snapshots
- Raw Sound Check: Let me just turn this down for a second to check what we've got here.
- Saving Settings: I want to save the current sound that we're hearing. All the parameters should be set the way I want. I'll save this into:
- Snapshot 1
- Snapshot 2: Adjust filter down a little.
Modulation Routing
To set these parameters to the control sections, do the following:
- Highlight the parameter by pressing it (highlight it in blue).
- You can set modulation routing by going to the Perform section and pressing Control 1. Now, Control 1 is affecting the cutoff filter.
Modulating Parameters
- Cutoff Filter: Drop the depth down from high to low.
- Filter Resonance: Call up Control 2 to affect resonance on filter one.
Now, we can save the sound as Snapshot 2 which will have a slightly different sound from Snapshot 1.
Adding Effects
- Now let's move on to Snapshot 3. We'll add modulation on the effects:
- Turn up the delay.
- Set the delay rate to a 16th note, then speed it up to an eighth note.
Setting Control Parameters
- For Control 3, set the delay mix and bring it down to where needed.
- Ensure that the parameters for Control 4 are also adjusted as discussed.
Managing Modulation Targets
- You can have up to 16 modulation targets in this instrument, though we're only using one right now.
Finalizing Snapshots
- Save the settings you've adjusted in Snapshot 4.
- As you play back the arrangement, ensure all necessary parameters are adjusted and saved in the snapshots.
Recording Automation
- You can record modulation as automation. To do this:
- Arm your automation in touch mode.
- Move the controls, switch back to read mode, and it's recording.
Conclusion
You can add any type of parameter to a control and set it to a snapshot. We have eight snapshots available. This creates something very unique and intrinsic to the track itself. It's not just pulling any old sample from a sample library; you're using something that has been recorded from within the track, thus giving it a very unique sound.
Next Topic: Ultrabeat and Virtual Drummer.
14 leçons
1h 19m de leçons vidéo structurées
Fonctions vidéo avancées
Ralentissez, bouclez un passage, suivez la partition
Mobile, tablette et ordinateur
Pratiquez où vous voulez
Satisfaction garantie à 100 %
Garantie remboursement 30 jours
Rencontrez votre guru
Rencontrez votre guru
Dov Waterman est compositeur, pianiste et producteur. Il a écrit et conçu le son de films tels que After Earth, Terminator Genisys, Transformers: The Last Knight et The Snowman, et travaille comme monteur audio de bibliothèques de samples et sound designer avec des sociétés comme Native Instruments et SonoKinetic.
Sa série Composition in Logic parcourt la construction d'un morceau de bout en bout dans Logic Pro — des templates et du workflow jusqu'à la synthèse et la programmation de beats, les effets MIDI, le montage et le mix final — pour les producteurs qui veulent transformer leurs idées en disques aboutis.







