



Teclados y sintetizadores

Con
Paul WhalleyPaul Whalley desglosa los teclados y sintes del tema - los pads, el chorus y las capas del post-estribillo - y cómo cada uno da forma a las secciones.
Qué incluye el curso
26 lecciones (1h 43m) · 1 gratis
01. Parte de guitarra - conceptos
1:37
02. Parte de guitarra
4:58
03. Voces - conceptos
1:22
04. TAREA: Recrea la producción de la guitarra
0:37
05. Voces
9:42
06. DESAFÍO #1: CONSTRUYE EL ARREGLO VOCAL Y EL HOOK
0:45
07. Coros
4:07
08. Teclados y sintetizadores - conceptos
0:54
09. Teclados y sintetizadores
Estás aquí9:38
10. Bajo - conceptos
1:01
11. Bajo
5:24
12. Batería - conceptos
0:58
13. Batería
9:49
14. TAREA: Recrea la producción de la batería
0:32
15. Efectos y partes atmosféricas - conceptos
1:09
16. Efectos y partes atmosféricas
5:53
Transcripción de la lección
Breakdown of Keys and Synths in the Song
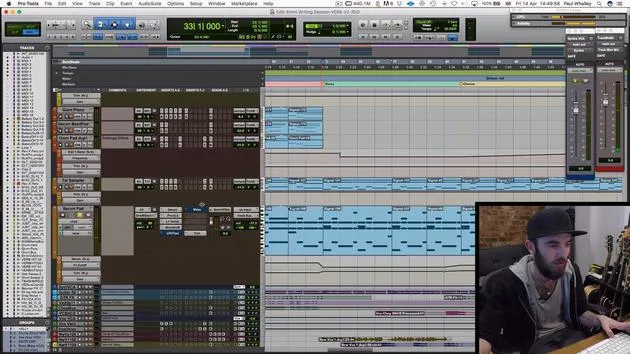
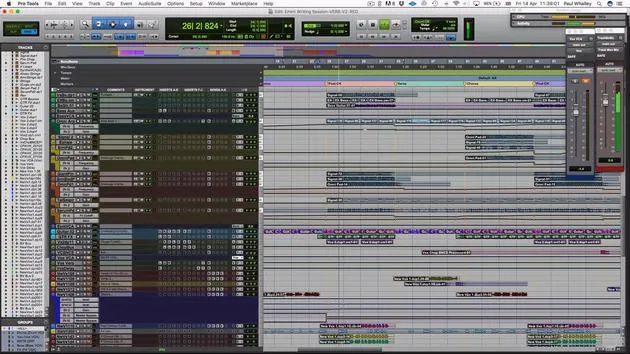
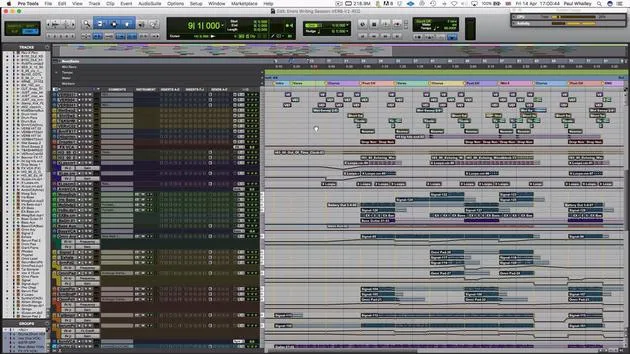
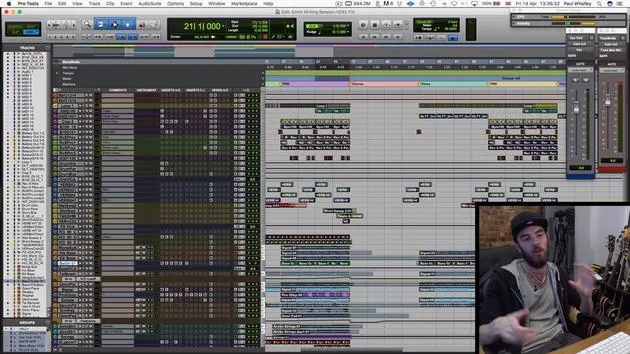
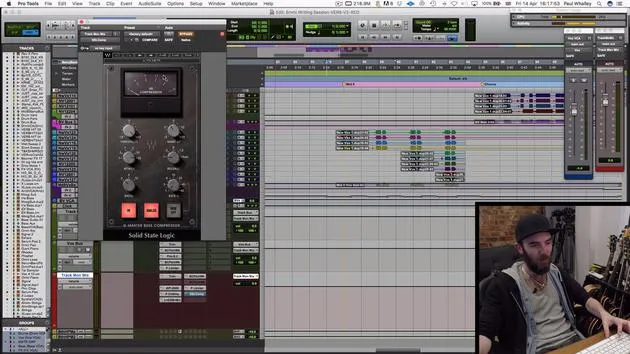
Right, guys, so we're going to be breaking down the keys and the synths involved in this song next. You can see over here because I've got them color-coded.
Synth Groups
There are three main groups of the synths:
- Pads: These two pads run pretty much throughout the length of the song.
- Chorus Synths: These are the ones in yellow that take part in the chorus.
- Post-Chorus Synths: These orange ones happen in the post-chorus.
I chose to use these different groups because it really helps define the sound of each section. If I run from the end of the chorus into the post-chorus here with just the synth soloed, you'll see how the color completely changes. So, two very different sections.
Treatment of the Continuous Synths
To start with, I'm just going to break down some of the treatment I've got on these two synths here that run all the way through the song.
- First Synth: This synth comes in during the first post-chorus and then runs through the verse and the rest of the song following it.
- That part sounds like this: very soft, nice, and warm, but on its own, it's a bit sloppy and muddy.
- This is just using a synthesizer called Serum, but you can do this kind of synthesis with any inbuilt synthesizer in your software.
Processing Steps:
- Cutoff Filter Automation: This rolls out the high end, transitioning from a bright sound to a more closed-up sound in the verses.
- Equalization: Taking out more of that muddy low end. There's a particularly ringy frequency that I've dropped out with the EQ.
- You can see this "ghostly vision" here indicating what the frequency was ringing at.
- Limiter: To boost the volume and cover the dynamic changes as the filter changes.
- Stereo Imager: To help widen the sound.
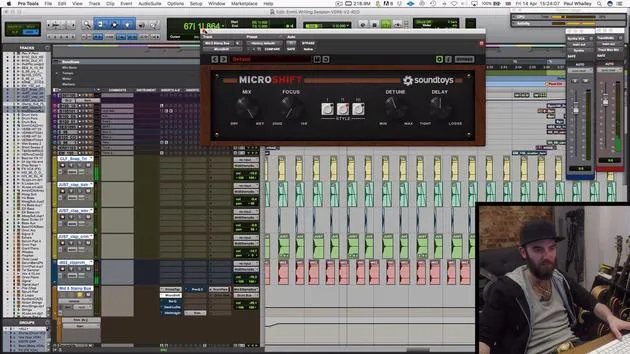
- LFO Tool: One of my favorite plugins! This creates a sidechain effect as if it was synced to a kick drum, allowing it to pulse.
- Noise Gate: Just to eliminate any extra sound or sounds that go on too long.
Second Synth
Next up, we have this synthesizer here, which is a really odd sound.
- This is built out of a vocal sample that I took of the singer.
- I took a note that she sang, added a really long reverb tail to it, exported that sound, and imported it back into the sampler.
- I like doing things like that; it helps make the record sound a bit more unique and gives it distinct characteristics.
Processing Steps:
- Distortion: A little added for color; note that this already has some built-in effects.
- Equalization: Rolling out all the low end and a lot of the high end to tame the sound.
- Reverb: Just to make it sound a bit more ghostly, like a choir.
Those are the two main parts that run throughout the song.
Chorus Synths
Next, we're going to have a look at these chorus synths.
- First Chorus Synth: A kind of moving vocal synth that's gently pumping.
- Here, I'm opening up the filter to get a bit brighter as it approaches the chorus.
- Second Pad: Based on an old string synthesizer.
Processing Steps:
- Very little treatment is applied here because I spent a while crafting each sound that I wanted.
- The key part here was that I actually built it from the bottom one first.
- I then wanted to add a bit of warmth, which led me to create this second padding serum.
- Next, I wanted more of that vocal color from the verse, which I got from that second synthesizer.
- Lastly, I used a fourth one to add real movement and driving force.
Post-Chorus Keys
Now, onto these final three here, which are the post-chorus keys.
- String Pad: This same string pad from the chorus is used here, but I'm now utilizing a different part of the sound.
- I've opened up all the filters, making it a lot more moving, using the LFO Tool again here to create that pulsing effect.
- This results in a sound that is quite interesting; I made it harsh and aggressive, automating various features to achieve that gritty, dirty feel.
Classic Piano
The part that really brings it all together is just a straight old classic piano.
- On its own, it doesn't sound that interesting, but with the processing:
- Heavy Compression: To flatten it out and make it sound meaty.
- Distortion: Quite a bit added to make it stick out.
- Delays and Reverbs: To help color the sound and give it more movement.
- Final EQ: I like to run EQs on almost all my tracks, rolling off everything between 100 and 150 Hz at the bottom to clean things up.
Gluing the Parts Together
When I glue these parts together:
- I start with the piano part.
- Add in the string synthesizer to add some movement.
- Then this harsh pad creates a distinct sound that differs from the chorus section, allowing the song to develop.
The important reason I have these two synths running throughout the whole song is that it helps create coherence and glue between everything.
- I've automated a few different features here, filters and gains for volume control, but having those in really helps with the transitions between the various sections.
Conclusion
Running out through the rest of the song, you can see that in the middle eight, I use a different palette again, and then back into the chorus, I return to my palette with the orange synths, adding in these two main synthesizers as well.
26 lecciones
1h 43m de lecciones en vídeo estructuradas
Funciones de vídeo avanzadas
Ralentiza, repite un pasaje, sigue la partitura
Móvil, tablet y ordenador
Practica donde quieras
Garantía de satisfacción 100%
30 días de garantía de devolución
Conoce a tu gurú
Conoce a tu gurú
Paul Whalley es multiinstrumentista, productor y compositor con un sonido deliberadamente amplio. Pasó años de gira como músico de sesión con artistas como Mumford & Sons y Ellie Goulding. Con formación clásica, tiene un grado universitario en interpretación instrumental y un Máster en composición por la Guildhall School of Music. Desde que pasó de las giras a la producción y la composición ha trabajado con artistas como NAO, Wretch 32 y Nina Nesbitt, y ha tocado en discos que han entrado en el top 40 de todo el mundo, incluido 'Shout Out to My Ex' de Little Mix. Tiene su base en los Tileyard Studios, al norte de Londres, donde escribe y produce para grandes sellos del Reino Unido y desarrolla a nuevos artistas. En MusicGurus, él y Emmi Green descomponen un disco de pop desde cero —cada decisión de arreglo y producción al descubierto— para compositores y productores que quieran escuchar cómo se construyen realmente los éxitos.







