



Set-Inhalt und Performance-Technik
Lesson time: (21min 23sec)
Mark Burnett geht die Elemente seines eigenen Ableton-Live-Sets durch und zeigt, wie sie auf dem Bildschirm erscheinen und in Klang umgesetzt werden, mit Ausschnitten aus seiner Live-Performance.
Course preview
This lesson is part of the course Wie du mit Ableton Live und externen Instrumenten ein umwerfendes Live-Set kreierst
Watch a preview of the full course below.
Lesson transcript:
Music Performance Lesson
Introduction
Well, we've covered quite a lot of different details regarding what's actually going on behind the scenes:
- How things are connected
- How they're routed
- How they're controlled
- What mappings are taking place
We haven't really covered any of the content here. Part of the reason for that is that, ultimately, the content will be unique to you.
Performance Overview
I'm going to run you through what currently constitutes my live performance. I'll demonstrate:
- The kind of elements I've got
- What they look like on screen
- How they relate to actual sound
In order to do that, I will probably do two, three, or four little excerpts where I just perform a bit of some of the clips that I've got, and then I'll rewind and talk you through specifically what's going on.
Starting the Performance
Now, I've been listening to the first couple of clips quite a lot. So, what I'm going to do is move forward through the sound a little bit now and try out a part from later on.
The first thing I'm going to do is launch a scene that doesn't have anything on so we've got a stop, no sound coming through, and I'm going to start building up some parts.
I just played a short excerpt from somewhere in the middle of the performance there. I started by bringing in a couple of the audio parts and triggering some of the drum parts. I also made some errors because errors are always involved.
Audio Tracks and Effects
Launching Audio Clips
-
BD Hi Hat
- It's straightforward and self-explanatory. If I play this now, you'll hear a hi hat, it's just a piece of audio.
- I applied a little bit of reverb to it. I can turn the reverb up and use the reverb mute button to turn it entirely off and on again.
- I also applied a bit of delay and changed the delay settings for some crazy time warping effects.
-
Electro Clip (Track 6)
- A simple part: a synthesizer that I've resampled and left as audio.
- Again, adding things like a bit of reverb and delay.
-
Lead Part
- Another audio part that's a simple, textural atmospheric thing with a vocal vibe to it.
After establishing the internal audio, I began bringing in the external instruments.
External Instruments
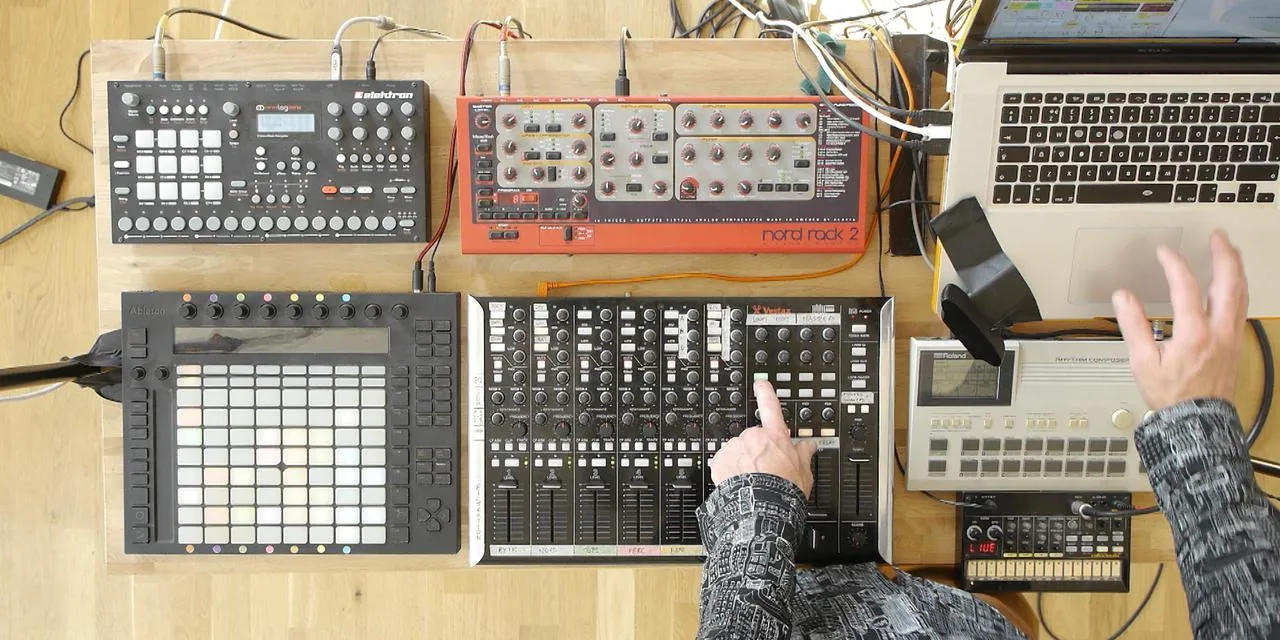
On tracks 7 and 8, I've got the Volca and the 505. Let's play the Volca beats first.
-
Volca Beats
- I've created cues with little white clips that indicate the clock pitch of the kick drum on the Volca Beats to keep in key with that track.
- I'll adjust accordingly: turning down the kick gives a really low, long decay tone.
-
505
- It has a snappy snare drum. I used the loop features to capture a bit of that snare to build tension.
- I launched a combination of kicks and bass to complete the mix, applying some simple transition techniques.
Using Push for Navigation
You'll notice I'm not using the Push extensively, but it helps me visualize what parts are playing. It allows me to introduce parts from earlier or later in the performance as necessary. I often decide that there's a drum part or synth part I want to launch based on where I am in the performance.
Scene Launching
- A scene is a horizontal collection of clips. It's very useful to jump to a specific collection of clips to create complicated music transitions.
Analog Rhythm
Overview
Now, let's quickly delve into what's going on with the Analog Rhythm.
I've programmed three patterns, which are complete drum patterns. Here's a quick demonstration:
- Pattern 1
- Pattern 2
- Pattern 3
Mute Control
The rhythm allows me to mute individual parts. During the performance, I generally just bring in the occasional hi hat or snare drum for added movement.
Main Body of the Performance
Introduction of Audio Parts
So let's look at another section of the performance. I started introducing a few audio parts, then brought in some from the external instruments.
I used effects from the master section to create tension and build-up, and then launched a scene to trigger a collection of clips forming the main body of this part of the performance.
Listening to Clips:
- Shaker Loop
- Bleepy Loop
- Additional Effects
Final Thoughts on Composition
The sound coming out of the Nord is a single MIDI clip with a sustained note (a C).
- It's pumped and reverb is added.
- The rhythm varies depending on what's muted.
- I incorporate various hi hats, kick drums, and snares.
Creating Movement Most of the content consists of simple parts. I'm creating more extensive parts by piecing together elements and manipulating assigned parameters and effects.
Ultimately, it's about building tension and dynamic transitions while ensuring the performance remains engaging and original.
About the instructor
Mark Burnett ist ein Ableton Certified Trainer, der seit über 14 Jahren mit Ableton-Produkten arbeitet. Als Produzent und DJ bei Funk'n Deep Records liefen seine Tracks auf großen Festivals sowie in Sets und Podcasts von Künstlern wie Carl Cox und Richie Hawtin, und er hat vor Tausenden von Menschen gespielt. Außerdem veranstaltet er große Events wie das Workhouse Project und studierte am Imperial College London. Sein Kurs behandelt den Einsatz von Ableton Live zum Aufbau von Live-Performances und eignet sich für Produzenten und Performer im Bereich elektronischer Musik, die ihre Show aus dem Studio auf die Bühne bringen möchten. read more