



Sends and Returns

With
Isaac CotecIsaac Cotec shows how sends and return tracks let you share one effect across several tracks in Ableton Live, saving CPU and keeping your set tidy.
What's in the course
17 lessons (1h 52m) · 1 free

Lesson transcript
Adding Effects in Ableton Live
In this module, we're going to be looking at adding effects and how we can change the sound of our different audio or MIDI through using effects within Ableton Live. Live comes with a selection of custom designed, built-in audio effects. Every track in Live can host a number of devices or effects.
Types of Effects
There is a wide range of effects from audio effects to MIDI effects. Each of these devices can change the sound and quality of your sound.
Adding Audio Effects
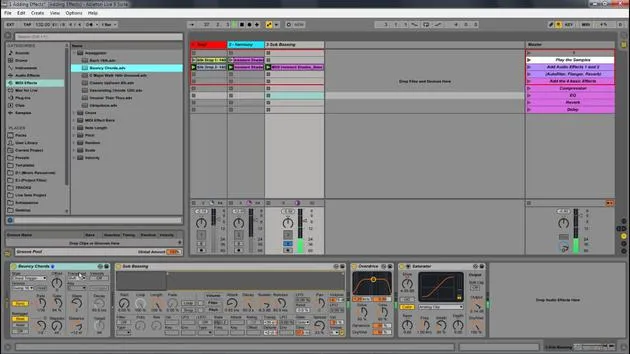
To add an audio effect to a track, all you need to do is drag it in from the browser.
- In this instance, in the browser, I'm looking at my audio effects and can drag in different effects by just clicking them and dragging them in.
- Each audio or MIDI effect also has presets.
- To open these presets, just click the triangle next to the effect. This will open the list of presets.
In the image below, we are viewing the presets for the Auto Pan.
- So in this image, within the browser, I've selected audio effects, and then in the audio effects, I've selected Auto Pan.
- If I hit that triangle, we then get that other list of presets (1 to 4 note, and so on).
Demo in Ableton Live
Now let's look at this within Ableton Live.
- Go to my browser and my audio effects.
- The first thing I want to show you is how we can open and shrink those different presets.
- With the Auto Pan, all you do is press that triangle and it opens up.
If you wanted to, you also have your MIDI effects. You can open those up as well.
- Let's say we have our audio effect and I'll just play this to start.
- If I want to add some type of audio effect to these, a simple one could be Flanger. I can drag that in and notice the changes it makes.
Changing Sound Quality
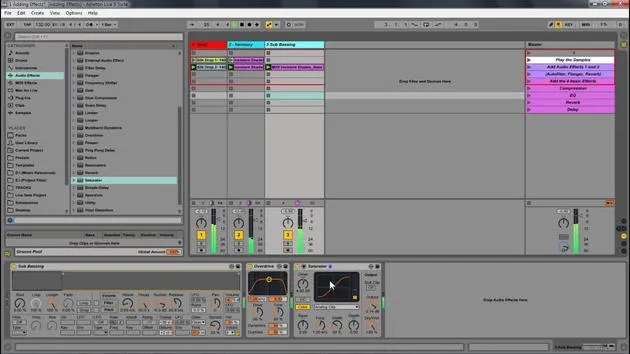
Now let's add other effects, like Overdrive to our bass as well as a Saturator.
- We've changed the quality of the sound by adding those different effects.
- This is to a MIDI instrument, and I just put those after the instrument.
If I want to add a MIDI effect, I can simply pick something like Arpeggiation and put it before the instrument.
- From there, I can delete that and just have the original with these different effects.
We have a huge range of effects here, way more than we would have time to go over.
But you can just easily add them into your instrument and start playing around with them.
It's the most easy, straightforward way of picking up effects. You just drag it in and say, "Okay, what does Corpus do off on?"
You can try different presets and then just come in here and play around with things until you can figure out what it does.
Ableton Live Manual
The Ableton Live manual, both online and in their printed version, also has a great section on audio effects that goes through what the different effects are and what they do.
You can already see how I've started to change the overall quality of my sound by adding that Flanger and adding this Overdrive saturation effect to my bass.
The Four Basic Types of Effects
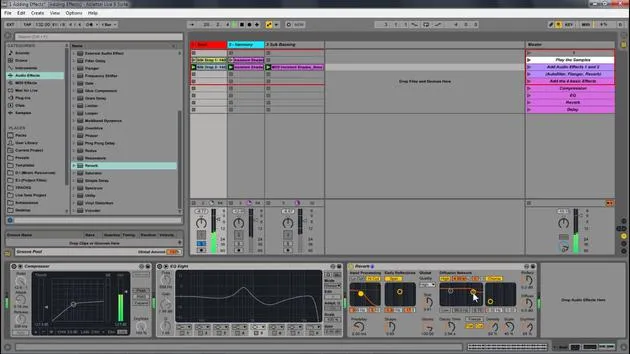
Now let's look at the four basic types of effects that we have. These are things you'll see over and over within production and editing:
- Compression
- EQ (Equalization)
- Reverb
- Delay
Compression
Let's look at what compression is.
- Compression controls dynamic range.
- It really helps you get more volume out of your sound.
Think of it as squishing the sound together, so there's less range in it.
- Now you can make it louder or softer.
Notice how the hi-hats are going to be a lot more pronounced when I turn this compressor on. Everything just seems a little bit more loud.
EQ
You have two basic EQs within Ableton Live, EQ8 or EQ3.
- I'm going to turn off EQ3 for now.
- With EQ8, I have eight different parameters that I can turn on and off.
- You can boost specific sections of your sound, turn them down, and adjust the sharpness of the gain.
Reverb
If I add reverb, it's going to change the spatial feel of it.
- It emulates a room or some type of space that that sound might be in.
- You can change parameters like wet/dry, decay time, and the size of the room to achieve different effects.
Delay
Lastly, we have delay effects.
- Ping Pong Delay and Grain Delay are two options within Ableton.
- Adjust the delay time, feedback, and dry/wet mix to create interesting echo effects.
Understanding Effects
Here are those four basic effects you should be familiar with:
- Compression: Changes the dynamic range or volume of your sounds.
- EQ: Affects different frequencies of the sound.
- Reverb: Creates a sense of space as if the sound was reverberating in a room.
- Delay: Emulates an echo or a repeat of the sound with a slight time delay.
Hot Swapping and Saving Presets
Now let's look at Hot Swapping and saving within Ableton Live.
We have a few options here to help you create and switch out instruments whenever you want.
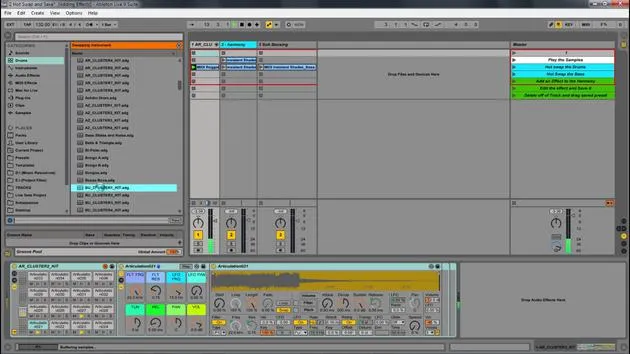
- Hot Swap lets you quickly move between presets.
- This little Hot Swap button is present on every device in Live.
Using Hot Swap
For example, while playing drums, I can hit the hot swap button, which brings me to the window where I had these drums, and I can pick different options.
- I can hear what an Acoustic Kit sounds like or any other kits available.
The same concept applies for drum racks and instruments, as it works for your effects as well. Simply drag in an effect, hit the Hot Swap, and choose a different one.
Saving Presets
Ableton Live also lets you save presets, which is a powerful way to build your own library of effects.
- The saved presets are added to your user library, making it easy to drag them in anytime.
Now let's look at External Plugins.
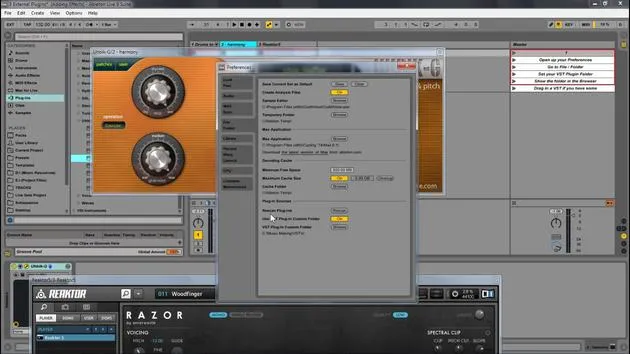
If you want to use an external plugin within Live, they need to be set up first, whether it's a VST or Audio Unit.
External Plugins
An audio unit is Mac only, and it gives you access to more plugins and audio effects to play with.
- You don't need to dive into using external plugins right from the start; learn what's in Ableton first.
Setting Up Plugins
To add an external plugin:
- Go to Options > Preferences (or Live Preferences on Mac).
- Under File and Folder, enable the use of VST plugins.
- Point to the folder where your plugins are stored.
Sends and Returns
Now, let's look at Sends and Returns.
- Returns are different types of tracks that we can use for effects, allowing us to manage our resources effectively.
Managing Effects
Sends and returns allow us to have multiple sources sending to the same audio effect, reducing CPU usage.
- Open and close your sends and returns.
The send knob controls how much sound is directed to the return track, where you can house your effects.
Example of Using Returns
If I want different reverbs or effects on various parts of a track, I can use a return track.
- Load a reverb effect onto a return track and adjust the send levels from the individual tracks to control how much effect is applied.
Now I can change parameters just once, and all tracks sending to that return track will reflect the new settings.
Conclusion
That's adding effects to your different tracks, audio and MIDI tracks, utilizing return tracks, sends, and really being able to start affecting your sound through the various audio effects available within Ableton Live.
17 lessons
1h 52m of structured video lessons
Advanced video features
Slow down, loop a passage, follow along
Mobile, tablet & desktop
Practise wherever you are
100% satisfaction guarantee
30-day money-back guarantee
Meet your guru
Meet your guru
Isaac Cotec is, arguably, one of the best Ableton trainers in the world! While working on his own music, he began teaching recording techniques, sound design, and Ableton Live to private students, and since earning his certification as an official Ableton Certified Trainer he has helped thousands of producers step up their game and succeed as musicians.
Isaac started producing electronic music in 2005 with Psyche Sonics, an experimental group working with the science and research of binaural beats and altering consciousness through sound. After touring, he continued writing music under the alias Cotec and later emerged as the artist Subaqueous, blending his electronic past with both future and organic production techniques. To date, he has released 3 albums and 4 EPs.
Isaac is also the founder and manager of the record label Invibe Music, which represents some of the Pacific Northwest's best electronic music and specialises in midtempo dance music.
In his Ableton Live courses, Isaac shares the production, sound design and songwriting techniques he has spent years refining - the very skills he uses to turn a spark of an idea into a finished track.







