



Arranger, travailler avec les sections et les marqueurs
Avec
Aamir YaqubAamir Yaqub montre comment utiliser les sections et les marqueurs dans Logic Pro pour organiser ton arrangement, en coupant, déplaçant et gérant les parties à mesure que ta session se remplit.
Le contenu du cours
12 leçons (0h 56min) · 1 gratuites
Transcription de la leçon
Arranging and Working with Elements in Your Music Session
So we're going to take some time to talk about arranging and working with all of the different elements as you're putting them together.
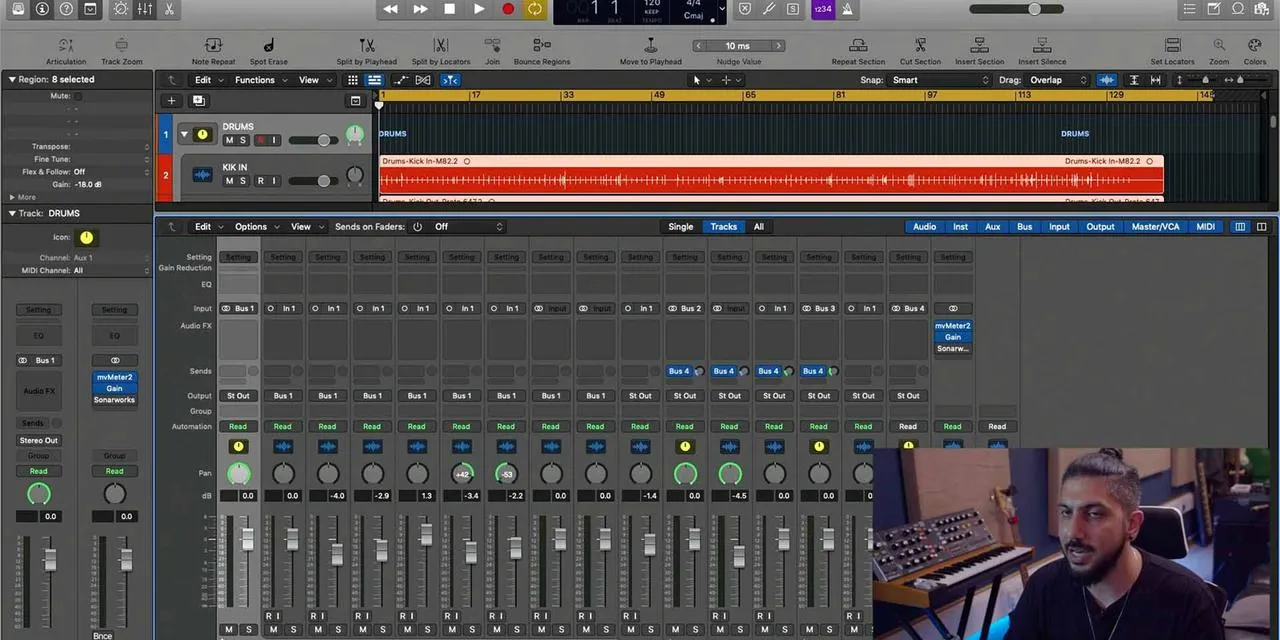
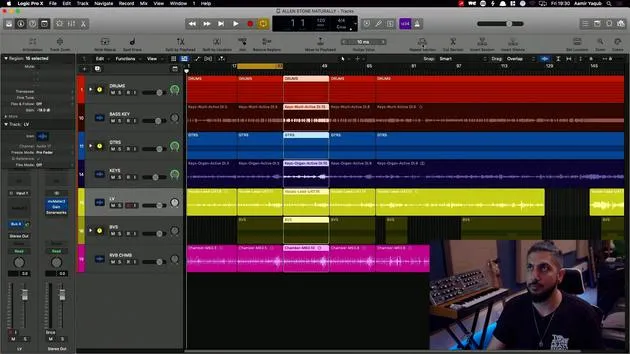
As your session starts to fill out, it might look a little bit more like this:
- Certain tracks organized into track stacks.
I'll show you how to do that shortly. But one thing that you want to really get to grips with is how you can take sections, move sections, and manage sections in play.
Cutting Sections
Here, what I have is I'm going to open up my toolbar. You remember that toolbar there?
- From here to here, what if I wanted to just cut that section out entirely?
- Well, I can just go to the cut section here, and that will get rid of that section.
It actually brings the other section forward or backwards, however you want to look at it in your arrangement.
I'm going to undo that and show you that if I didn't do it that way, I'd have to:
- Grab my marquee tool, which is handy.
- Drag those all backwards.
Sometimes, I'd miss something like that BV track. But if you follow the method I just showed you , that is, using the cut section option , it just automatically does it for you.
Working with Cycle Range and Locators
Now, the cool thing about this is that you're working with the cycle range and the locators.
- If you remember, we could select one thing like that and do Command + U.
- The cycle range goes above that, and we can go, for instance, cut that section out entirely.
It's super easy and simple to work with.
We also have the option to:
- Repeat a section - For example:
- Command + U, repeat this section.
- Repeat it again.
- And again.
You can see that everything kind of moves in the way that it's supposed to, rather than you having to manually adjust each section.
Inserting and Managing Sections
You can also:
- Insert a section at any point.
- Insert silence if you wish to do that as well.
Another really handy feature that you should get into using is the arrangement markers, which we looked at when we explored the drummer tool.
Using Arrangement Markers
I'm going to open up my global tracks here. Right at the top, I have something called arrangement.
- If I press plus, I will get an arrangement marker.
- If I keep pressing plus, it continues to give me arrangement markers.
Right now, I might not necessarily have an intro that lasts for a specific amount of time, so I might want to:
- Get rid of that marker and make it shorter.
- Or I might want to make my chorus double the amount of time that it is.
I can do that easily.
Naming and Renaming Markers
I can also go in and:
- Name and rename any markers.
- For instance, if I don't have a bridge straight after a chorus, I can click on that and change it to a verse.
Then I can add another chorus, which would be a certain length.
Now, if I want to manage the arrangement markers, here's what I can do:
- Hold Option, grab this, move it, and you'll see that everything underneath that arrangement marker actually goes along with it.
This is a really handy feature because you can do that kind of stuff.
Deleting Markers
If I decide, "I don't know about this bridge," I can click on this marker and delete it.
- It will delete the bridge for me.
Arrangement markers work effectively for grabbing, cutting, and moving sections around. They are linked to everything underneath them, similar to how we saw with the cycle range.
Adjusting Your Arrangement
For example, if I have a verse and decide I want to have my chorus before it, I can easily move my verse in between the chorus and the next verse and everything shifts accordingly.
The earlier you start working with arrangement markers, the easier it will be for you to arrange your tracks.
Tempo and Signature Changes
As we look at the global tracks, remember the flexibility of tempo fluctuations throughout the course of your track.
- Right now, it starts at 120 BPM, but I can click there to move it up and click there to move it down.
To make a more gradual change, I can grab the little node created there and shape the curves. This can be really effective for:
- Classical music
- Film scoring
Similarly, if I want to change my key signature or time signature at any point, I can add a change. For instance, if I wanted to change to 6/8 for a little while, I can add that, and you will see it reflected.
If I move the playhead and want to revert back to 4/4, I can just adjust it there, and it will change back accordingly.
Viewing Changes
If you're ever wondering how this looks, go to your list view, and you'll see:
- Your tempo changes.
- The bar positions.
- The tempo changes that occur.
- Any key and time signature changes.
If I right-click in my global tracks and go to Transposition, I can see the option to transpose everything together. This works with MIDI data as well:
- For example, if I wanted to do a half-step transposition up during my chorus, I can just add that and move in semitones up or down, adjusting all of the MIDI data in the song accordingly.
12 leçons
0h 56m de leçons vidéo structurées
Fonctions vidéo avancées
Ralentissez, bouclez un passage, suivez la partition
Mobile, tablette et ordinateur
Pratiquez où vous voulez
Satisfaction garantie à 100 %
Garantie remboursement 30 jours
Rencontrez votre guru
Rencontrez votre guru
Aamir Yaqub est un producteur et ingénieur du son basé à Londres. Il a travaillé avec certains des plus grands noms de la musique, dont Alicia Keys, David Guetta, Rihanna, Sia et will.i.am, tout en développant des artistes indépendants.
Au fil de ses cours, il enseigne l'intégralité de son flux de travail sur Logic Pro : de l'interface et de l'enregistrement à la création de beats, la synthèse et les effets MIDI, jusqu'au mixage et à la finalisation d'un morceau.







