



Die Walking-Bassline - Licks und Improvisation
Mit
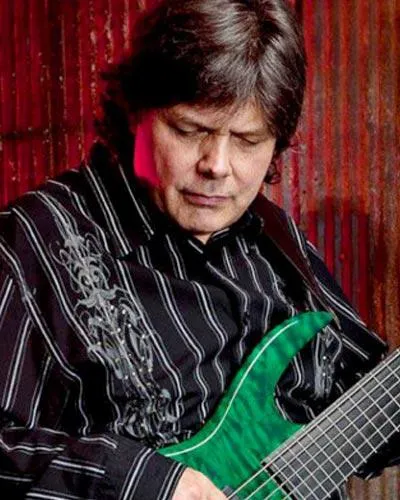
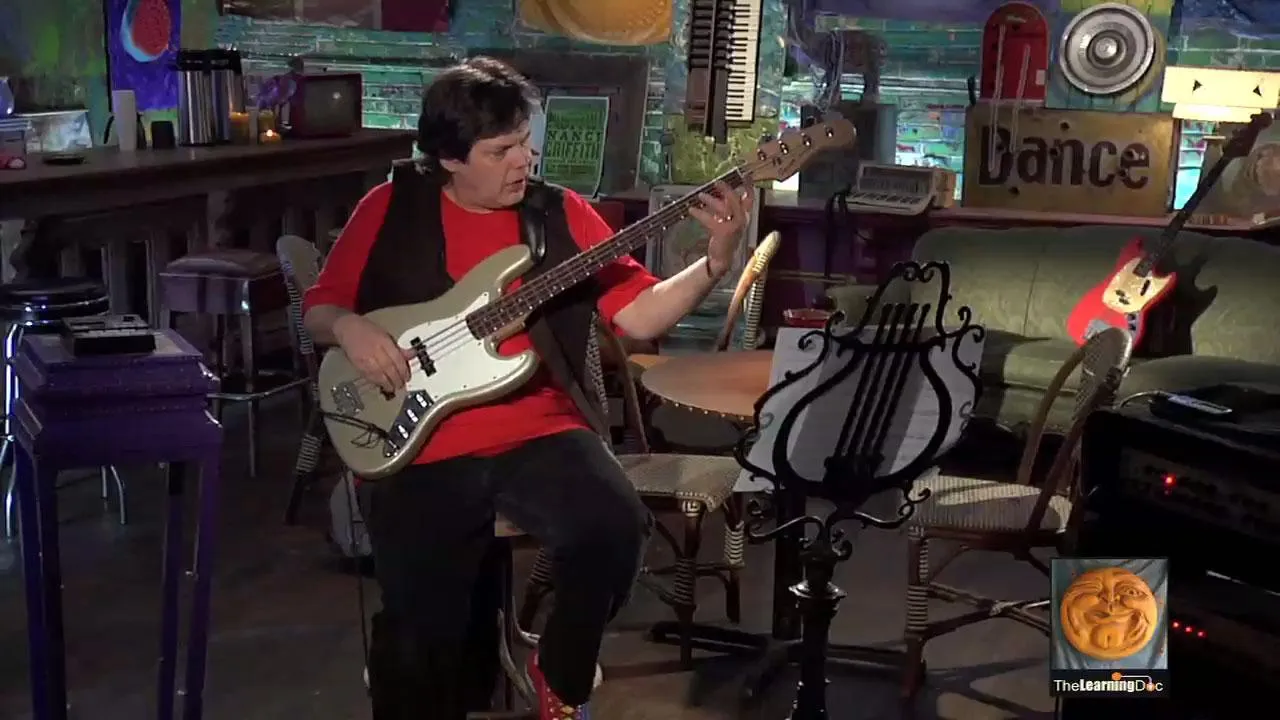
Roy VogtRoy Vogt arbeitet auf das Improvisieren von Walking-Basslinien hin und beginnt mit einer den ganzen Hals umspannenden Variante der Aufwärmübung 'hazard', um deine Finger zu lockern.
Das steckt im Kurs
5 Lektionen (3h 17m) · 1 gratis
Transkript der Lektion
Music Lesson: Warm-Up and Techniques
Warm-Up Exercise: Hazard Exercise
Okay, now what we're going to do here is warm up with a little wrinkle on one of those first exercises called the hazard exercise. Remember that one? That was the one where you walk across and leave one finger, walk back down, and leave the other.
This time, I'm going to walk all the way up the neck doing this. This is a little trickier, but it's a little more advanced lesson. So I think we can do this.
I'm just doing:
- 1, 2, 1, 2, 1, 2.... One, two.
Now I'm going to leave one. Remember in the hazard exercise, that stays up on top. So 2 and 3 are going to walk across. Cool!
Now see, 1 and 2 are there. I'm going to walk across. 3, 4.
Alright, now this is where it gets a little different. I've switched up. I was here, and so what I'm going to do is I'm going to use my second finger on the next higher note, C. I'm going to walk down.
Now my first finger is on the A flat or G sharp (the fourth fret). I'm going to leave it there, walk across. I'm feeling a pretty major stretch here.
Okay, now 1 and 2 are here. They're the flip of where they were. 3 and 4 are going to walk across.
Okay, now my fourth finger is here. I'm going to move my first finger there. Now I'm up on the seventh fret. You can walk the whole range of the bass doing this. This really kind of stretches out the tendons in your forearm.
Note: It gets a little harder when you're up here.
Why It's Harder Up the Neck
The reason why it's a little harder is because, on most basses, this neck's gonna get a little wider as it moves up. It just depends on the type of instrument you have.
You can take this and you can work it as far as you wish. If it starts getting uncomfortable, stop. Remember, the whole idea of the warm-up is a stretch to get you ready to play.
Swing Feel
Now let's talk about swing feel. We briefly touched on this when we were looking at Don't Be Bop. The main thing that you've got to remember with swing quarter notes is that they ring one into the next.
Because what you're trying to do is emulate the drums:
1, 2, 3, 4. 1, 2, 3, 4.
There's my swing right there.
Now a quick reminder: What are we listening for in terms of the drummer? What matches those quarters?
What matches those quarters is his ride cymbal. The ride cymbal is that cymbal on top that he's playing:
Ding, ding, ding, ding, ding, ding, ding, ding...
We'll take a listen to how that will fit.
Okay, now this is going to be the same tempo that we've just played: 120. Remember we were doing 2 and 4.
1, 2, 1, 2, 3, 4. Can you hear the ride cymbal? Ding, ting, ting, ting.
So basically, what I'm going to do is try to match that ring. Now, see, if I start cutting the notes off, it doesn't feel as good.
So when you're playing these swing lines, you really want to go ahead and let everything ring. One note rings into the next just like that ride cymbal.
Cycle of Fourths Progression
One of the things that we talk about in jazz harmony is what's called a cycle of fourths progression.
A cycle of fourths progression, essentially, is:
- C
- F
- B flat
- E flat
- A flat
- D flat
- G flat
- B
- E
- A
- D
- G
- C
So essentially, what I'm doing there is playing all 12 tones. Now, that can be a little tricky to do when you're just learning.
Quick Method for Cycle of Fourths
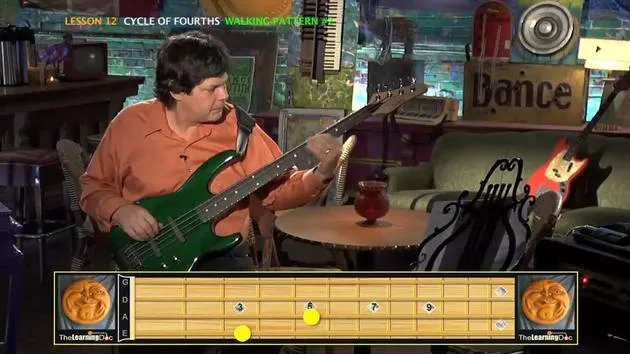
So here's a kind of a quick and dirty way to do a cycle of fourths:
- I start up here on the C (remember, this is like the 15th fret).
- To do the F, which is the next note in the cycle of fourths, I go to the lower string, and go down two frets. Here's my F, then I go straight across.
Continuing this pattern:
- There's B flat, go back two.
- There's E flat across, A flat, back two.
- There's D flat across to G flat or F sharp.
- Then B, E, A, D, and G.
Alright, what I'm going to do is play just the roots. I'm going to do quarter notes with this ride cymbal. So I'm going to try to match the swing feel.
1, 2, 3, 4. There's my cycle right there.
Walking Lines in Cycle of Fourths
Now I'm going to show you some lines that I might use working through a cycle of fourths.
This first line is basically walking down:
- Root (1)
- Flat 7 (6)
- 6 (5)
What am I talking about? These are scale degrees: root, flat 7, 6, 5.
Then I'm going to walk back up:
- Root (1)
- 2
- Flat 3 (3)
- 3
Remember all those approach tones we were talking about?
There's that tension of playing a G sharp against an F7 chord. See, that sounds kind of wrong, but if I go to the third, it resolves it.
A lot of what makes a jazz bass line sound the way a jazz bass line does is this tension and resolution.
Practicing the Lines
So what I'm going to do is walk that through the cycle, starting on C. I'm going to walk on the descending and then back up. We'll do it at 60.
1, 2, 3, 4.
Okay, now because that has a flatted seven on the descending line, I'm pretty much boxed into either using this against a dominant seventh chord or a minor seventh chord. It has to be something with a flatted seventh in it.
Now the ascending form of that will end up being kind of usable in a whole bunch of different ways.
Because if we're doing a minor chord and I do this ascending form:
- Root
- 2
- Flat 3
- 3
Then that A flat becomes the third of the chord. This A natural would sound like a mistake, except I'm going to resolve it to the B flat.
So it's an approach tone. We'll do this at quarter note equals 80. So you've got lots of time to think.
1, 2, 3, 4.
The nice thing about doing these walking lines is that at least half the battle is keeping your walking quarter note pulse and locking in with the drums.
More Patterns and Techniques
Let's look at a couple more of these patterns, and then we'll look at the tune.
This next pattern is root, 3, 5, flat 5. So this is just going to be the triad.
Practicing with the Cycle of Fourths
If I'm going to do my cycle of fourths exercises in that way, that very first one, I'm going to have to drop the third below the root C.
I'm going to drop down to E, which is the third, up to the fifth.
Then there's my approach tone, flat 5, which is going to lead to the F.
When I go to the F, I'm going to put my third on top of the root, so it's going to be above.
There's my 5, and there's my flat 5. Now I'm at my B flat.
Practicing at Different Tempos
Okay, so here we go at 60.
1, 2, 3, 4. Cool.
Alright, now if I want to, if I need to play that over a minor chord, all I've got to do is drop the third.
So instead of playing C to E, I'm going to play C to E flat because that's the sound of that C minor triad: C, E flat, G, G flat.
So this is a whole cycle of C minors going to F minor, going to B flat minor, going to E flat minor.
Once again, it's:
- Root
- 3
- 5
- Flat 5
We're still doing just the descending cycle of fourths.
1, 2, 1, 2, 3, 4.
Now, you can always spend all of your time moving back down.
Thinking in Areas on the Bass Neck
The next thing to do when working with your cycle exercises is to think about the bass neck as three areas:
- From the fifth fret to fifth position down
- Between 5 and 12
- 12 and above
With each of these, you're going to find different challenges. If you're doing the cycle of fourths in the first position, the first couple of positions, you'll have to deal with a lot of open strings, either as the third of the chord or as a root.
The middle of the neck is usually where everybody's the most uncomfortable. So making yourself stay here is a great way to learn the neck.
You know, we used to think that this was an intimidating part of the neck because it's way up here and the notes are high pitched and close together, but it's actually the same as down here.
It's the absolute same as the first position.
Increasing Speed
Okay, I'm going to ramp up the tempo a little bit.
Do quarter note equals 100, and I'm going to freestyle through all three of these. Now this is just an example. This will lead you in the direction you need to go.
So this would be kind of a goal. Don't necessarily feel like you have to play my line; just take some of my basic ideas and work with them.
In this case, I'm going to do dominant sevenths all the way through this.
So the chord tone is going to be:
- Root
- 3
- 5
- Flat 7
1, 2, 1, 2, 3, 4.
Exploring Different Frequencies
Okay, that's on the bottom of the neck. You notice I had to use a lot of open strings to make that work.
Here's the middle of the neck:
1, 2, 1, 2, 3, 4, sa.
Now finally, here's the 12th fret and above.
1, 2, 1, 2, 3, 4.
Okay, so those were all at quarter note equal 100. We'll take bits of this and look at “Turn Down”, our first band tune.
Tune: Turn Down
Quick reminder: These little techniques and tricks that I'm telling you regarding working with a walking bass line or creating a walking baseline are just the tip of the iceberg.
We could do a whole series of 20 lessons on just one walking bass line. So this is something that I really encourage you to keep studying.
Practice the lines that I've given you. Really work them out in the loop section. But more importantly, take these and experiment with playing them through the cycle of fourths, just like I did.
Working Through the Progression
Alright, now let's take this and work through the progression of Turn Down.
I'm going to kind of block these out. Since you've had a chance to kind of learn chords as well, you can play them along with me if you want.
We'll do this at quarter note equals 60. I'll count you in.
1, 2, 3, 4. D minor 7, G7, C major 7. I'm going to hold that for two bars. Now, I'm going to go C minor 7, F7, B flat major 7, B flat minor 7, E flat dominant 7, A flat major 7.
It's a little rumbly down here, but that's alright.
E minor 7, A7, D major 7.
Understanding the Chord Progressions
Now, all those progressions that I played are what are called in jazz parlance, a 2, 5, 1.
Let's look at why. Like a lot of jazz tunes, this one changes keys every four bars.
- The first part, D minor 7 to G7 to C major 7 is in the key of C. That D minor 7 is the two chord.
- Remember, we talked briefly about the diatonic chords in the last lesson.
Here's my two chords, second degree of the scale. It's a minor seventh chord.
There's my five chord, G7. Fifth degree of the scale. It's that one chord within a diatonic chord system that is a flatted seventh or dominant seventh chord. And the one is a C major seven.
The second little bit there is actually in the key of B flat:
- C minor 7 (2)
- F7 (5)
- B flat major 7 (1)
And then in the interest of clarity, I'm going to take this B flat up here.
There's our two minor seven, B flat minor seven, E flat seven.
So if my two is B flat, what's my one? Right? It's an A flat major seven.
Reading Through the Walking Line
Okay, and then what finally turns me back around to the top of the tune is:
- E minor 7 to A 7 to D major 7.
Now I'm going to read through this walking line, and I want you to notice something. We'll use a lot of the same patterns that I outlined in my lesson.
Do this at a slow tempo first, then a medium, then a fast. This is 60 beats per minute. I'll count you in.
1, 2, 3, 4.
Practicing at Varied Tempos
Okay, now let's do that same thing again. This time we're going to do it at 80 beats per minute. This is our medium tempo.
1, 2, 3, 4.
Finally, our fast tempo, which is actually the very first tempo you'll be playing with the band. Let's give it a try.
1, 2, 1, 2, 3, 4.
Jam Session with the Band
Alright, now we'll go ahead and jam with the band on Turn Down. See you at the club!
Transitioning to Blues Style
Now what we're going to do is take some of those walking licks that we looked at in your lesson and apply them to a tune.
This is a tune called Turn Down. We're moving down by whole steps in a 2, 5, 1 progression, which is something we covered in the lesson.
Remember, I'm playing with Brian's ride cymbal. When you're playing swing, you listen from the top of the drum set down, not the bottom of the drum set.
Sa wa sa. Alright, now it's your turn. Remember, after you've played my line, try making up lines of your own using the patterns. Good luck.
Feedback on the Jazz Tune
Alright! How'd you do with the jazz tune?
That is not an easy concept to get your head around.
As a matter of fact, I think that really working with jazz is almost a lifetime study. Musically, there are so many different things that you can practice and work with.
Now we will look at a couple of other styles of jazz playing a little later.
Transforming Walking Lines into Blues Lines
For right now, let's take some of those walking lines and kind of transform them into blues lines.
The first pattern is just root, 3, 4, 5. This can move anywhere.
Practicing the Blues Pattern
This is at 60. Notice I'm just using a movable pattern. If I want to go to the 4 chord, just plug the same pattern in.
This is old news for us.
Here's my five chord. We're going to do that a little quicker. I'll count you in. 1, 2, 3, 4.
Increasing the Tempo
This is quarter note equals 100.
I'll count you in.
1, 2, 3, 4.
Alright, now let's move to another line. This is one that gets used in a whole bunch of tunes and a whole bunch of different styles. I first learned it when I was listening to the late Ray Charles and a song called What I'd Say.
Here's the bass line:
Root, 5, 7, root.
The Ray Charles—
It's however we're going to treat this as quarter notes. Start at 60. Here we go. I'll count you in. One, two, three, four.
Really simple pattern: Just 1, 3, 1, 3 (root, 5, 7, root).
Practicing the Patterns Faster
Going Faster at 80 BPM
Okay, let's do that a little quicker. This is 80 beats per minute.
1, 2, 1, 2, 3, 4.
Even Faster at 100 BPM
Now let's go even quicker still. We'll do 100 beats per minute.
This is actually a little faster than the tempo that I'm playing on the blues tune. But it's good to have a little bit more speed if you need it.
That way you can always just relax and concentrate on the groove.
1, 2, 1, 2, 3, 4.
Final Walking Line
Okay, now there's one more walking line, and then we'll look at the core of the tune.
This walking line is used at the cadence of the tune, and it is very much like what we just worked on in terms of these approach tones:
Root, 3, 4, 4 sharp and then back down. 5, 4, 3, 2.
It has that nice chromatic movement to it.
Practicing the Chromatic Line
Let's do this at quarter note equals 60.
1, 2, 3, 4.
We'll do this a second time.
Okay, we're going to do it at the mid tempo: 80 beats per minute.
I'll count you in.
1, 2, 3, 4.
Fast Tempo Practice at 100 BPM
Finally, let's do it at 100 beats per minute.
Like I said, this is slightly above the tempo actually being played with the band.
But it's always good to be a little bit on the other side of it so that you can relax instead of just worrying about being able to technically play the part.
Here's quarter note equals 100. I'll count you into it. 1, 2, 1, 2, 3, 4.
Core Blues Riff
Alright, now let's look at the core blues riff.
The core blues riff is that root, five, seven, root. But I'm going to put a flat 3 on top of it.
See how that gives it a nice little lift.
Blues Riff Practice at 60 BPM
Let's do this. I'm going to go ahead and put that kind of swing pattern or actually I'm going to do like a shuffle blues pattern.
Here's 60 beats per minute and here's that core riff.
1, 2, 3, 4. Good.
Increase the Tempo to 80 BPM
Let's go ahead and make that a little quicker. It's 80 beats per minute.
1, 2, 3, 4.
Going Rapid at 100 BPM
Now even more rapid of a tempo.
Or, I'm sorry, rapid of a tempo.
Let's find where that's coming from.
Eventually, you can use this and you can write your own blues.
I recommend the Donnie Darko Blues myself. 1, 2, 1, 2, 3, 4.
Jam with Jonell
Alright! Now let's go over to the club and jam with Jonell.
See, never did lack for nothing, though I found a lot of time to complain. You always give a nimble that end up you keep me on the gravy train. Everything nothing a girl could want passed in front of me, I just let it walk on by. Now that I finally see...
(Continue with song lyrics...)
Conclusion and Stretching
Okay. Hope you had a good time playing the blues, playing with Jonell, and playing with the guys.
Alright, let's do a couple of stretches, and then I'll meet you back at the next lesson.
You know this one! What I'm doing is just locking my fingers and stretching out, stretching those forearms out, stretching the tendons.
I'm going to pull back.
So it's a good thing to do after you've had a really, really long day playing. A lot of times, I'll do this after a gig.
Alright, join me on the next lesson. We'll be looking at modes and learn how to use those in both jazz and fusion styles.
See you there!
5 Lektionen
3 Std. 17 Min. strukturierte Videolektionen
Erweiterte Videofunktionen
Verlangsamen, Passagen loopen, mitlesen
Handy, Tablet & Desktop
Üben, wo du willst
100 % Zufriedenheitsgarantie
30 Tage Geld-zurück-Garantie
Lern deinen Guru kennen
Lern deinen Guru kennen
Roy Vogts Karriere umspannt eine außergewöhnliche Bandbreite an Bühnen, von MTVs Headbanger's Ball, dem Montreux Jazz Festival und dem Montreal Jazz Festival bis zum London Palladium, der Grand Ole Opry und dem Kreml. Von Punk bis Funk, von der Schlichtheit von Country und Blues bis zur Komplexität von HyperJazz und World Beat - er hat alles gespielt.
Roy war der erste Mensch, der an der renommierten Musikhochschule der University of Miami einen Master in E-Bass-Performance erwarb, und er widmet sich seit über vierzig Jahren der Kunst des Basses. Er war Mentor Dutzender erfolgreicher Profis, darunter der legendäre Willie Weeks. Elektrisch, bundlos, Kontrabass - was auch immer: Wenn es tiefe Töne spielt und Saiten hat, ist Roy ein Meister darin, es zu spielen und anderen beizubringen, dasselbe zu tun.
Im Laufe seiner vier Jahrzehnte währenden Karriere hat Roy mit einer erstaunlichen Liste von Topstars aufgenommen oder gespielt, darunter Larry Coryell, Victor Wooten, Dave Weckl, Tom Scott und der LA Express, Chester Thompson, Miroslav Vitous, Glen Campbell, BJ Thomas, Chet Atkins, Engelbert Humperdinck, Dickey Betts, Tony Joe White, Charlie Daniels, Jerry Reed und viele Dutzend mehr.
Roy unterrichtet seit dreißig Jahren auf Hochschulniveau. Seit 1983 hat er den Lehrstuhl für Bass an der renommierten Belmont University (Nashville, TN) inne, einer der ganz wenigen Hochschulen, die einen Studiengang in kommerzieller Musik anbieten, der darauf ausgelegt ist, Studierende zu professionellen Musikern an der Spitze der Branche zu machen. Roys Studenten sind mit namhaften Stars wie Trisha Yearwood, Faith Hill, Little Texas, Michael W. Smith, Lady Antebellum, Chick Corea, Sir Tom Jones, Blood Sweat and Tears, Yanni und unzähligen weiteren Musikikonen getourt und haben mit ihnen aufgenommen.
Seine Serie Teach Me Bass Guitar bringt dir genau diesen Ansatz auf Hochschulniveau nahe und führt dich vom Schnellstart für absolute Anfänger (Vol. 1) über Rhythmusgrundlagen (Vol. 2), das Finden deines eigenen Stils (Vol. 3) und ernsthafte Musikalität (Vol. 4) bis hin zu einem Werkzeugkasten für Profispieler (Vol. 5), damit du Schritt für Schritt echte Fähigkeiten aufbaust.







