



Juntarlo todo
Lesson time: (54min 35sec)
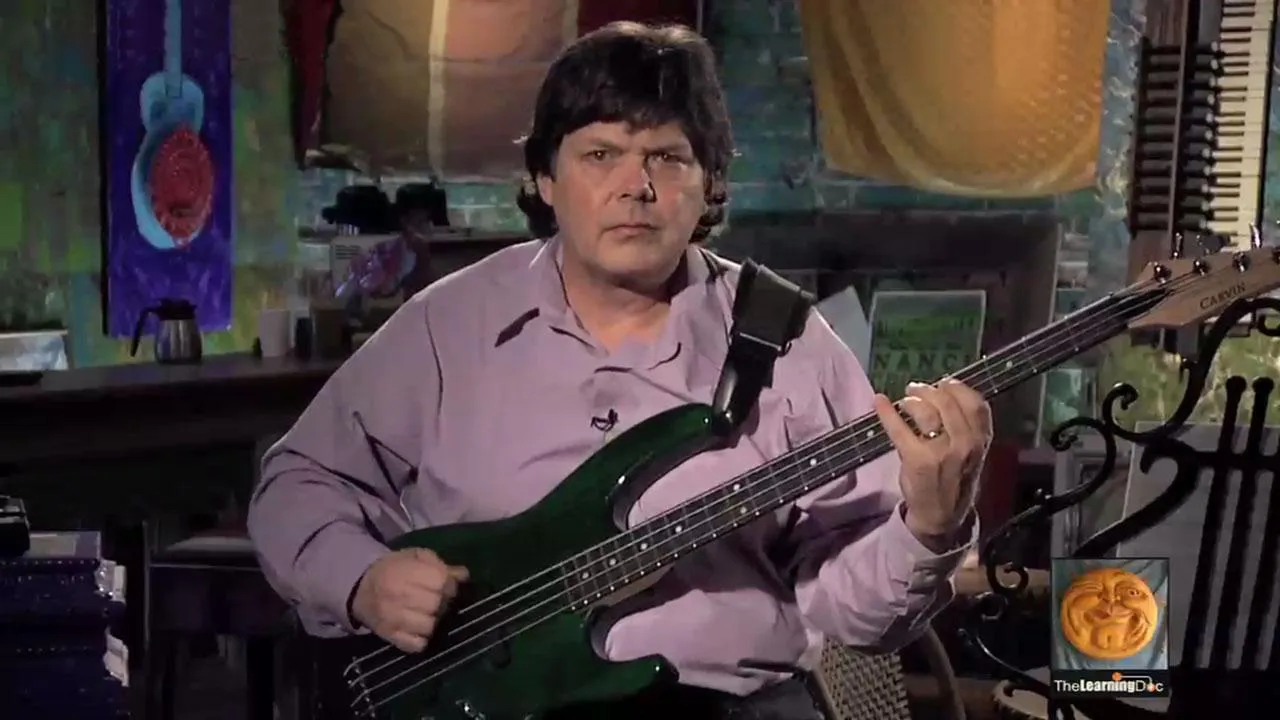
Roy Vogt lo junta todo: arpegios de tríada en dos octavas con la forma de octava en 'L' a lo largo del mástil, más dobles cuerdas al estilo de Stanley Clarke en el tema Stanley's Secret.
Course preview
This lesson is part of the course Teach Me Bass Guitar vol.2: Fundamentos del ritmo
Watch a preview of the full course below.
Lesson transcript:
Music Lesson Formatting
Warm-Up Exercise
Okay, for our warm-up, let's go back to the very, very first exercise that we were doing. But now we're going to do it with a little bit different purpose.
Way back in lesson one, we were playing all the notes on the neck up to the 12th fret. This time, we're going to do a kind of hand-over-hand position and we're going to run a chromatic scale up the neck.
Play and Say
So, it's back to that play and say. You can still play and say if you need to. If not, just think about it like this:
- 1, 2, 3, 4
- Then I'm going to shift over.
- 1, 2, 3, 4
- 1, 2, 3, 4
You can slide up if you want. Get that F. Let's go to the A and do that:
- 1, 2, 3, 4
- 1, 2, 3, 4
Slide back down. Let's go to the D. Finally, let's go to the G.
Weightlifting Concept
Now, you can also do what I call "weightlifting" with this. You know, if you've ever worked in a weight room or worked with free weights, one of the things you learn quickly, if you don't want to hurt yourself, is that you start with a small amount of weight and then only when you're ready do you increase the amount of weight you're going to lift.
So, to do weightlifting with a scale exercise like this, chromatic scale, what I'm going to do is find where my comfortable tempo is. Maybe your comfortable tempo is going to be quarter note equals 60 with eighth notes:
- 1 and 2 and 3 and 4 and 5 and 6 and 7.
Just try to keep it even while doing hand-over-hand. Now, that's at 60. If I can do that comfortably at 60, I'll probably notch the tempo up just a little bit, maybe to like 63.
You notice when I'm doing this, I'm really trying to keep my hand close. I don't try to let those fingers fly away. Now, especially when we're looking at the second tune, there's going to be a little 16th note riff and we might want to do the weightlifting with that. We'll come back to this whole weightlifting concept with some of these faster licks on this particular tune.
Connecting the Neck
Now let's look at what we can do to connect all of this neck. We've got this area, we've got this area. One of our little secret weapons for getting around on this instrument is the L shape, that little octave.
- There's our G, there's our G.
So what I can do is play the same material twice:
- G, B, D.
Say I did 2, 1, 4. Now I'm going to move two strings over and two frets up, there's a G octave. I can totally duplicate that root 3, 5. So that gives me a way to connect the bottom of the neck with the middle of the neck.
Inversion Chords
Now I've actually come up with another chord voicing, starting with the third on the bottom. So I'm on the B in that G triad. This is called a first inversion triad. The first inversion means that I've gone to the first note of the chord above the root.
- So that's 3, 5 root.
Notice I have this kind of upside-down L shape:
- B, D, G.
I can take that, move it two strings over and two frets up, and there it is. So if I put those two together, that gives me that whole range from around the third fret on the E string all the way up to the 12th fret in two moves.
Let's play that together. I'll put that down to quarter note equals 60.
Playing Together
So let's go ahead and play quarter notes at 60. The key when you're doing these movements is to think ahead:
- 1, 2, 3, 4.
Okay, you can take that same kind of concept or pattern and work all your other triads. So if I want to do the G minor triad going all the way back to lesson three, here's my basic shape:
- 1, 4, 3.
I can take that, move two strings over and two frets up, there's the connection point. And then with this one, it's a little stretchy because I've got a little bit of a jump between the B flat and the D:
- 1, 4, 4, B flat, D, G.
There's that first inversion chord. The only difference is I've flattened the third:
- B flat, D, G.
Now let's play that together. Coordinate equals 60. I'll count you in:
- 1, 2, 3, 4.
So you can once again take G minor and cover about half the bass neck with two moves.
Additional Chords
Okay, we've got two more chords we're going to play around with. These are actually going to be the diminished and the augmented.
Diminished Chord Exercise
So with the diminished, what I'm going to do is use the 1, 4, 2 shape:
- 1, 4, 2.
Let's go ahead and play that one in free time. Now let's add the first inversion. This time it's going to be like that minor triad I just played, except I'm going to flatten the fifth:
- B flat, D, G, B flat, D flat, G.
Let's try connecting those in tempo. I'll count you in. Watch on the screen and you can see how this works:
- 1, 2, 3, 4.
Augmented Chord Exercise
Okay, there's only one triad remaining. That's the augmented. In this case, what I'm going to do is use a stretch fingering because I'm going to have to cover this in groups of two strings.
Slightly different, I'm not using the diagonal, just kind of stretching the head. For the root position chord, we've got:
- G, B, D sharp.
Then I'll repeat that up an octave:
- G, B, D sharp.
As I move up the neck, I get:
- B, D sharp, G, B, D sharp, G.
So fingering wise, that's going to be:
- 2, 1, 4, 2, 1, 4, 1, 4, 3, 1, 4, 3.
Let's play that in tempo. I'll give you a four count:
- 1, 2, 3, 4.
Importance of Jumps
Now the cool thing about this is that this will allow you to do some pretty major jumps on the bass without really worrying about getting lost. One thing many people do when they start learning the bass, if they're not careful, is they'll learn everything down here and then crawl up and down the G string.
The problem with that is that means if I were trying to do, say this G major one and I did that, I have all this jumping to do. Every time I make a major jump, I have a greater possibility of making a mistake. The further apart things are, the more there's a possibility of an error.
Double Stops Exercise
Alright, what we're going to do now is take those little riffs from "Funky" and the "Phone Poles" and the one spot from the last lesson and move those to play two notes at the same time. This is called a double stop.
We talked a little bit about tenths last time. That's taking a third of the chord and playing it up an octave, which gives you a whole lot less muddy sound if you do that. So it can be really effective.
Open Strings and Stopped Notes
What we're going to do here is look at it two ways. One of them is using open strings and stopped notes to get some chords. We're going to use this in one of our tunes a little later.
Here is a G sharp on the 13th fret of the G string and this open E. Now, if I want to change to a D chord, all I've got to do is to move back:
- F sharp and D.
Here you are. There's your sound. All I have to do at this point is to drop down to C sharp and A.
Right Hand Technique
Now, when I'm dealing with this with my right hand, I have a couple of choices. I can take two fingers, especially if the strings are close together. The other thing is if I've got a split of four strings, like on this first chord, I'll take my thumb and just pluck down and either take my index or my middle finger and pluck up.
It's kind of like I'm pinching the notes. Let's try those in time. This is at 60 beats per minute. I'm just going to do whole notes with this:
- 1, 2, 3, 4.
Creating Sound with Movement
Now what I'm going to do is create more or less the same sound with one difference. I'm also going to just move these around the neck. If I take this open E and play it up here at the 12th fret, then I can reach across. Either use 1 and 3 or 2 and 4.
It doesn't really matter. Just go with what's comfortable. So here's E and G sharp. I just move the shape down to D and F sharp and then down here to A and C sharp.
Changing to Minor
Now, those are majors. To change them to minor, all I've got to do is take that third and go right across. There's E minor, D minor, A minor.
The other thing we'll find in the tune called "Stanley's Secret" is power chords. A power chord double stop doesn't have any sort of third in it, so you can use it over A major or A minor. It really doesn't matter.
For instance, if I'm doing an E5 power chord voicing, it's basically this E and B. I'm just going to play them together. Let's do the same thing for B and F sharp. It's a B5 voicing, and then I'll go ahead and go down to the bottom of the bass and do an E5 voicing again.
Practice with the Band
Okay, what I'm going to do now is play them in time, everything involved here. I'll give you a count in and why don't you play along with me? This will be appearing on the screen, so I'll count you in:
- 1, 2, 3, 4.
Now the double stops with closed position.
- Now the minors.
- Now the power chords.
Okay, now right hand wise.
Rasgueado Technique
What I did with the power chords was what's called a rasgueado or a rake. This is something flamenco guitarists do. Essentially what I'm doing here is rolling my fingernails. It gives me a nice little clattery sound because of the hardness of the nails.
So I'm just rolling them across strings or I can just pick these. It's really your choice.
Introducing the Tune: "Stanley's Secret"
Alright, this first tune is called "Stanley's Secret." It's in the style of a Stanley Clarke tune called "Silly Putty" and also an early Stanley Clarke tune called "Lopsy Loo." You might want to hunt out those recordings.
Stanley is one of my favorite bass players—a wonderful technical wizard, and also very, very musical. He's definitely worth checking out.
Talking Through the Tune
So what I'm going to do is talk you through this tune and then we'll play it with a band. The first part of the tune just uses that same double stop chord that we started with. This is really a stock Stanley sound. He uses this on a bunch of stuff:
- There's the E and G sharp,
- D and F sharp,
- C sharp and A.
So it's an E chord, D chord, and an A. That happens twice.
Power Chord Sequence
Then I'm going to do power chords on the A, the G, and the E, then B, G, A. Now this is that lick I was talking about that we might want to do a little bit of weightlifting with:
- B, D, E, D,
- B, A, B, A,
- A, G, A, G,
- E, D, E, D.
Okay, that's what is called a minor pentatonic. This is a little advanced preview of one of our later chapters.
Weightlifting Exercise
So let's look at working this as a little bit of a weightlifting exercise. We're going to do eighth notes equals 61 and 2 and 3 and 4 and again 2, 3, 4, 4. Now, what you would do is just notch that up a tempo at a time.
A little bit of an in-game tempo for that might be sixteenths. That'll get you ready for playing with the band. Now let's go ahead and play through this entire tune at quarter note equals 60.
Count In
I'll count you in. Here we go:
- 1, 2, 3, 4.
We play all that again. Now we're going to talk about what I'm doing here in a minute. Right now, just play along with me:
- 3, 4, 5, 6, 7, 8.
Bridge Section Explanation
Okay, now when I'm on the bridge, there are basically two chords that I'm playing. I'm doing double stops on the G and B and on the A and C sharp. But what I'm choosing to play on the bottom of the bass, as far as these open strings go, will change the sound of the chord.
So if I start with the open E and then go to the G and the B, that gives me an E minor chord. Remember, an E minor triad is just E and G. All I'm doing is dropping that E down a second octave. By doing that, I get to lose a little bit of the mud.
Chord Variations
Now that's basically A, A and C sharp. So that's an A chord. So I'm going back and forth between E minor and A, E minor and A.
Alright, let's go ahead and just practice those two chords. Remember, basically the way that it's working is I've got a G and a B up on top. That would be a G chord, but now I'm putting an E on the bottom. Same thing here, A, C sharp.
Practice Together
Now let's play those in time.
- 1, 2, 3, 4.
There you go. Now let's go ahead and take it to the stage and play this tune with the band. See you in the club.
Implementing All Lessons Learned
Alright, now we're going to put those major tenths with the open strings together from the lesson and also those fifth power chords. Now you'll notice in the middle of this tune, there's this lick that's actually an E minor pentatonic. That's going to be covered in lesson 14.
But for right now, just kind of enjoy the way that this all fits together. This is a tribute to one of my favorite bass players, Stanley Clarke. It's called "Stanley's Secret."
Your Turn
Alright, now it's your turn. Be careful.
Quicker Version of "Stanley's Secret"
Okay, now it's time to do the quicker version of "Stanley's Secret." So once again, what you're going to want to do is think ahead and really watch that pentatonic lick and we'll have fun with this one.
Alright, great job guys. Now it's your turn.
Transition to New Style
Alright! Now we're going to learn the second tune. This is one that is a 12-bar blues. You've seen those before. This one's a little different; it's a shuffle.
But we're going to do a melody not unlike what we did with the "Don't Bebop" tune in the earlier lesson here. This is going to be using those extended arpeggios, stacking those triads. If you need some time to re-familiarize yourself with this, you might want to go back to the first part of the lesson and work with the loops.
Chord Groupings
What we're going to be using is the B flat and then the E flat, but we're going to be using the second grouping. We're going to be starting with a third of the chord, which in this case is G, then going to B flat, and then going to E flat.
So remember, that's that first inversion chord and I'll stack that. Now we're actually going to be working that in reverse when we go through the tune.
Key Licks Practice
Alright, let's look at some of the key licks and play them in time. These are the first two bars of the tune. I'm going to play them really, really slow:
- Quarter note equals 60.
- 1, 2, 3, 4.
Now that repeats two or three different times in the course of the tune. The only thing that happens differently is there's always a slight difference in terms of that second measure.
12-Bar Form Practice
Let's try playing through the whole 12-bar form. I'll count you in:
- 1, 2, 3, 4.
Okay, now that's a lot of notes. But if you break that down and look at stacking those triads, that's going to make it a whole lot easier to play.
Rhythmic Figure Explanation
Let's talk about what's happening in the 10th bar of this tune. I'm playing a rhythmic figure called quarter note triplets. This is over a C minor triad.
I'm stacking two of the C minor triads. Right? But the way I'm organizing this rhythmically is quarter note triplets. We've done eighth note triplets. They feel like this.
- A quarter note triplet is the same kind of feel, but it's going to be over the course of two notes:
- 1, 2, one, two, three.
- One, two, three.
Now, if you're working this with a click, one thing you'll notice is that only the first triplet will be in sync with a click because you're essentially playing a two against three feel. So let's try this one again.
Practice with Click
Practice it one more time, and then we're going to go on to the bass line:
- 1, 2, 3, 4.
Alright, now after that workout, this bass line is going to seem really, really simple. This is a line we're going to see a little bit later when we talk about walking blues and walking lines. This is just a root octave 7 5.
Pretty standard Chicago blues type line. This is a B flat blues. We are going to use the 2 minor and the 5, the C minor 7 and the F7 in this.
Root Octave Exercise
So here's the line:
- 1, 2, 3, 4.
Fingering Technique
Now you'll notice pretty much the whole line is in fifth position. So I'm not really jumping around much on the octaves. I do change my fingering and let my hands relax.
So I'm doing a 1, 4, 1, 4 fingering. When I go to any scale oriented stuff, like later on in the tune when I look at bar 10, that C minor, I just start with my fourth finger:
- 4, 1, 2, 3, 4
- 3, 4, 2, 0, 1, 4.
So I'm using one finger per fret there.
Rule of Thumb
Remember my rule of thumb here is that if I'm playing kind of a box pattern like one of these walking blues lines, I'll tend to let that hand relax a little bit. And then if I'm playing a scale pattern, I'll spread out and do one finger per fret.
Now don't forget you've always got the pivot. If something feels like it's really stretching your hand out, try pivoting around to get the notes. That's going to be way easier.
"Mountain Goat Blues" Practice
Alright, we'll do "Mountain Goat Blues" one more time with the whole format of the tune. You'll be playing with a band, which is the melody, or what the jazz player would call the head, a walking line.
In this case, it's a Chicago style shuffle blues line and then back to the melody. So we'll do this at quarter note equals 60. You might want to practice this with your loop library before you go and play with the band. I'll count you in:
- 1, 2, 3, 4.
Alright, now let's take a break from "Chateau Groove" and let's go to the club and sit in with the band. See you over there.
Implementing New Techniques
Okay, now we're going to put all of those lessons that we learned about doing shifts like that into action with a tune that jumps around about like a mountain goat. So it's called "Mountain Goat Blues."
Alright, now it's your turn.
Brightening up the Performance
Okay, now we're going to play this a little brighter. Remember, the first part of this tune is a melody. I would never play anything that's busy in a bass line.
Conclusion and Cool Down
Alright, now it's your turn.
Alright! Well that was a lot of activity. You put your left and right hand through playing that. I'll show you another stretch you can use as a cool down.
Stretch and Dexterity Exercise
This one is also kind of a coordination exercise. What I'm going to do is take the first and third fingers of my left hand, then alternate 1 and 3, 2 and 4:
- 1 and 3, 2 and 4.
- 1 and 3, 2 and 4.
As a cool down, you probably want to just do this as a nice gentle stretch. As a warm-up or a dexterity exercise, you can do this as fast as you wish.
Sometimes if I'm working on dexterity exercises, what I'll do is save them for the end of my practice session so that if the muscles get a little tired, then I'm resting. It's not good to blow out your hands on dexterity exercises before a long practice or playing session.
So anyway, that will kind of take us to the end of this section. Now the next one is a whole new style of playing. We're going to use our thumb, we're going to pop the strings, and we're going to learn how to play slap and pop funk bass.
See you then!
About the instructor
La carrera de Roy Vogt abarca una extraordinaria variedad de escenarios, desde el Headbanger's Ball de MTV, el Montreux Jazz Festival y el Montreal Jazz Festival hasta el London Palladium, el Grand Ole Opry y el Kremlin. Del punk al funk, de la sencillez del country y el blues a la complejidad del HyperJazz y el World Beat, lo ha tocado todo. Roy fue la primera persona en obtener un máster en Interpretación de Bajo Eléctrico, en la prestigiosa escuela de música de la University of Miami, y lleva más de cuarenta años dedicado al arte del bajo. Ha sido mentor de decenas de profesionales de éxito, incluido el legendario Willie Weeks. Eléctrico, sin trastes, contrabajo - lo que quieras: si toca notas graves y tiene cuerdas, Roy es un maestro tocándolo, y enseñando a otros a hacer lo mismo. A lo largo de su carrera de cuatro décadas, Roy ha grabado o actuado con una asombrosa lista de estrellas de primer nivel, entre ellas Larry Coryell, Victor Wooten, Dave Weckl, Tom Scott y la LA Express, Chester Thompson, Miroslav Vitous, Glen Campbell, BJ Thomas, Chet Atkins, Engelbert Humperdinck, Dickey Betts, Tony Joe White, Charlie Daniels, Jerry Reed y muchísimos más. Roy lleva treinta años enseñando a nivel universitario. Desde 1983 ocupa la cátedra de Bajo en la prestigiosa Belmont University (Nashville, TN), una de las poquísimas escuelas que ofrece un programa de grado en música comercial diseñado para convertir a los estudiantes en músicos profesionales que trabajen en lo más alto de la industria. Los alumnos de Roy han girado y grabado con estrellas notables como Trisha Yearwood, Faith Hill, Little Texas, Michael W. Smith, Lady Antebellum, Chick Corea, Sir Tom Jones, Blood Sweat and Tears, Yanni e incontables iconos más de la música. Su serie Teach Me Bass Guitar te acerca ese mismo enfoque de nivel universitario, llevándote desde un arranque rápido para principiantes absolutos (vol. 1), pasando por los fundamentos del ritmo (vol. 2), la búsqueda de tu propio estilo (vol. 3) y una musicalidad seria (vol. 4), hasta un kit de herramientas de intérprete profesional (vol. 5), para que desarrolles habilidades reales paso a paso. read more