



Den Hals hinauf
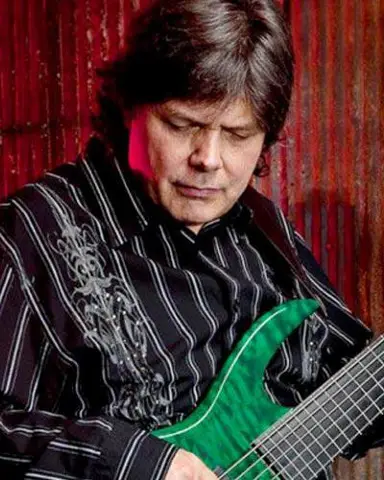
Lesson time: (64min 13sec)
Bewege dich auf dem Basshals in die Bünde 5 bis 9, mit verschiebbaren Akkordformen, der natürlichen, harmonischen und melodischen Moll-Tonleiter sowie zwei Stücken, um sie anzuwenden.
Course preview
This lesson is part of the course Teach Me Bass Guitar vol.1: Schnellstart für Anfänger
Watch a preview of the full course below.
Lesson transcript:
Warm-Up Exercise: Finger Independence
Okay, let's go ahead and warm up!
The Hazard Exercise
This is going to be a lot of information we have to cover, and we're going to need some finger independence. I'm going to give you an exercise that a friend of mine, Steve Bailey, came up with that he calls the hazard exercise. It's a really good one, but it definitely is something you're going to have to practice and work with slowly.
- What I'm going to do is use all four fingers independently.
- The very first thing I'm doing is walking 1 and 2 all the way across at the bottom of the neck:
1, 2, 1, 2.
1, 2, 1, 2.
Now, here's the hazard:
- My first finger stays up at the top of the neck on this G#.
- I'm going to use 3 and 4 to walk back down:
3, 2, 3.
My bad. 3, 2 to walk back down.
So if you followed me so far, your first finger is down here on the G string. Your second finger is down here on the E string. That leaves me two left.
- What I'm going to do is take these and walk across:
3, 4, 3, 4.
3, 4, 3, 4.
Stretching
Now I am feeling a little bit of a stretch and a little bit of a pull in my forearm. That's probably normal.
- What you want to do with this is just look at this as a stretch.
- Don't try to play it too fast.
- For right now, we can move it up the neck later, but for right now, just get used to working it down at the bottom of the bass.
You should feel a stretch in your forearm. Okay, don't overdo that! That's definitely one that you just take your time and do very, very slowly.
Lesson Overview
Now let's look at the lesson.
Navigating the Neck
In this lesson, we're going to address a question that some of you guys might have at this point, which is, Do I only play bass down here?
- No, actually, we're going to learn the whole neck, and we're going to learn how to navigate in the whole neck.
- We'll pay attention to the notes, starting with the first finger on the fifth fret.
- Remember, this is fifth position.
What we've done up to this point, with the exception of that one little A that we grabbed in the 12 bar blues, are these notes. So if I go up to the fifth position of the neck, my first finger is on the A on the E string.
Remember what I said? That's going to be the same note as the open string of the next string. Then as I move over to the D, the G, and then going to start getting into some ledger lines, here's a C.
Walking Across the Neck
Now let's go ahead and walk across the neck. I'll explain these, and then we'll play them together.
Remember, it's that same rhythmic pattern. That same melodic pattern, actually, is what I meant of half steps and whole steps.
- Start with:
- A#
- B
- C
Those are the notes on the first string.
- Go to the next one:
- D
- D#
- E
- F
- G
- G#
- A
- A#
- C
- C#
- D
- D#
Now if I call them by the flats going down, these top notes are going to change their names:
- Eb
- D
- Db
- C
- Bb
- A
- Ab
- G
- F
- E
- C
- B
- Bb
- A.
Now, since this is some new material, we're going to go ahead and play this at 60 beats per minute, but we're going to play half notes.
1, 2, 3, 4.
- A
- A#
- B
- C
- D
- D#
- E
- F
- G#
- A
- A#
- C
- C#
- D
- D#.
Let's go back down:
- Eb
- D
- Db
- C
- Bb
- A
- Ab
- G
- F
- E
- C
- B
- Bb
- A.
Once again, I want you to practice this with your practice loops and also play this and say it.
Movable Shapes and Scales
Alright, we discussed in the last couple of lessons movable shapes on both the major scales and also on all of our triads. Now, let's go ahead and apply this in a couple of other areas.
Moving Major Scale Shapes
Just as a refresher, you can take that major scale shape 24124134 and move that anywhere on the neck, and it will give you a major scale.
- For instance, I was here on the G
- G
- A
- B
- C
- D
- E
- F#
- G.
If I move up here to the D, I can use the same fingering. Now I'm playing a D major scale:
- D
- E
- F#
- G
- A
- B
- C#
- D.
Now we can take that, and we can use that information that we can move a pattern around and use movable shapes to learn three new scales. We'll learn them all over the neck.
Natural Minor Scale
The first scale is called a natural minor scale. So far we've had this major, and I guess you could characterize that as a kind of a happy sound.
- But we're going to use a minor scale.
- The minor scale has a flat three.
So I'm taking the third note of the major scale and flattening it. In this case, if I'm doing C minor, it's:
- C
- D
- Eb
- F
- G
And then the A is the same. The B is the same.
Now, if I'm doing natural minor, I will also flat the sixth note, which, if you remember, was A. I'm going to make that an Ab.
The seventh note was B. I'm going to make that Bb. And then we've got the octave up there.
C Natural Minor Fingering
So let's play that C natural minor. Using this repeatable fingering pattern:
- C
- D
- Eb
- F
- G
- Ab
- Bb
- C.
There's my flat three. There's my flat six. Here's my flat seven. If you look at the fingering pattern again, it is: 1, 3, 4, 1, 3, 4, 1, 3.
Moving the Natural Minor Scale
Just like the major scale, you can move that anywhere on the neck and play that.
- For instance, I can go to G, start down here on the G, and I can play:
- G
- A
- Bb
- C
- D
- Eb
- F
- G.
Or I can move over here to the D.
- D
- E
- F
- G
- A
- Bb
- C
- D.
Or I can move over here to the A.
- A
- B
- C
- D
- E
- F
- G
- A.
You notice all I did was just change where my first finger was, and I just plugged in the shape.
Important Note
Now, the devil's in the details. What you've got to do is make sure that you're not just playing finger patterns; that you're also thinking about the notes and calling the notes.
Playing the Scales Together
What I'm going to do now is take those first four scales, and I'll play them. You play them with me.
Okay?
We're still going to do quarter notes at 60, so we've got some time to think, although not as much time as we've had in the past.
Opening with C Natural Minor
1, 2, 3, 4.
- C.
- I'll play it back down:
- C
- Bb
- Ab
- G
- F
- Eb
- D
- C.
Moving on to G Natural Minor
Now let's move down to the G and do that one. This is going to be the exact same shape.
1, 2, 3, 4.
- G.
- A
- Bb
- C
- D
- Eb
- F
- G.
- Back down:
- G
- F
- Eb
- D
- C
- Bb
- A
- G.
Moving on to D Natural Minor
Alright, now let's move up here to the D. Do the same thing with D. Here's my first note. Just plug in the fingering.
1, 2, 3, 4.
- D.
- E
- F
- G
- A
- Bb
- C
- D.
- Back down:
- D
- C
- Bb
- A
- G
- F
- E
- D.
Wrapping Up with A Natural Minor
And let's wrap it up with the natural minor here by working with A. Here we go.
1, 2, 3, 4.
- A.
- B
- C
- D
- E
- F
- G
- A.
- Back down:
- A
- G
- F
- E
- D
- C
- B
- A.
Good!
Practice Other Natural Minor Scales
Alright! Just like lesson two where we looked at all the major scales, there are 12 possible natural minor scales.
- So what I'd like for you to do at this point, once you get these four down and have played them with me and are comfortable with them, is to practice the other natural minor scales and that pattern.
- Remember, the fingering pattern is going to be the same.
- The only thing that's going to change is where you start and the names of the notes.
So, these patterns can always help you.
Harmonic Minor Scales
Introduction to Harmonic Minor
Okay, let's look at harmonic minor scales. These are different from the natural minors that we've just looked at because one note has changed.
Let's start with the C. Remember, natural minor was:
- C, D, Eb, F, G, Ab, Bb, C.
For harmonic minor, it's:
- C, D, Eb, F, G, Ab, B, C.
Wait a minute. Isn't one minor scale enough?
Explanation of Harmonic Minor
Well, here's the reason why we do this. That note that I've changed, the B natural, works with what is called the V chord or the dominant chord, which is that chord, the G7 sound. If I'm doing a C minor progression, once again, I'm just doing the chords that we played in the earlier section of triads.
If I'm doing that, then I don't really get any sense of finality or any sense of cadence. If you listen back to music from the Middle Ages, you'll hear that. You won't hear a cadence.
So, the reason why they started writing harmonic and melodic minor is because that allowed the composer or the musician to play the V chord and then go to the I minor.
Playing Harmonic Minor
Now, we're going to get into that in depth when we start looking at jazz harmony and modal harmony. But for right now, let's look at the adjustment in the fingering we have to do to play harmonic minor.
Okay, so here's the natural minor in the key of C:
- D
- Eb
- F
- G
- Ab
- Bb
- C.
Fingering wise, it's as you remember: 1, 3, 4, 1, 3, 4, 1, 3.
My fingering changes with one adjustment on this top string. Instead of playing 1, 3, I'm going to play 2, 3. That gives me my raised seventh.
So now my fingering and my notes are:
- C, D, Eb, F, G, Ab, B natural, C.
Fingering wise, I'm changing that 1, 3 to 2, 3. So my pattern is: 1, 3, 4, 1, 3, 4, 2, 3.
Playing Harmonic Minor Scales
Now let's play the harmonic minor scales in the keys of C, G, D, and A, like we just did with the natural minor.
What I'd like for you to do, once you get these fingerings down, is to remember they all move. All of these fingerings can transfer anywhere.
- Work them in all the other 12 keys.
More than likely, the most common keys that you're going to use playing rock and roll are G, D, A, and E. Because those are keys that are very, very friendly to guitar.
The keys that you're going to play more when you're playing jazz or music with horns are F, Bb, and Eb. Because they are very, very friendly keys for saxophones and trumpets to play in.
Okay, for right now, though, let's do C, G, D, and A once again at 60 beats per minute. I'll count you in:
1, 2, 3, 4.
- C
- D
- Eb
- F
- G
- Ab
- B
- C.
Back down:
- B
- Ab
- G
- F
- Eb
- D
- C.
Moving to G Harmonic Minor
Now let's move on to G.
Just a quick walk through of the notes here. We're going to have:
- G
- A
- Bb
- C
- D
- Eb
- F#
- G.
Here we go: 1, 2, 3, 4.
- G
- A
- Bb
- C
- D
- Eb
- F#
- G.
Back down:
- G
- F#
- Eb
- D
- C
- Bb
- A
- G.
Remember, you can take your time and practice these on your own anytime you need to.
- You can go down to the loop station down at the bottom of the screen and click on that.
- You can play that at any point.
But remember, it's the same fingering so it's actually easier than we might think because I'm just playing that same 1, 3, 4, 1, 3, 4, 2, 3 pattern over and over again.
Moving to D Harmonic Minor
Here we go: the key of D, harmonic minor.
The notes are:
- D
- E
- F
- G
- A
- Bb
- C#
- D.
So let's play those in tempo:
1, 2, 3, 4.
- D
- E
- F
- G
- A
- Bb
- C#
- D.
Back down:
- C#
- Bb
- A
- G
- F
- E
- D.
Rounding Off with A Harmonic Minor
Okay, you hanging in so far? I know this is a lot of theory world, but we have to have this in order to understand music. Later this will come in handy.
Now, let's finish off with the harmonic minor. The notes are:
- A
- B
- C
- D
- E
- F
- G#
- A.
Let's play it up and down. I'll give you a four count:
1, 2, 3, 4.
- A
- B
- C
- D
- E
- F
- G#
- A.
Back down:
- A
- G#
- F
- E
- D
- C
- B
- A.
Good!
Summary of Harmonic Minor
Remember: I can take those shapes and move them anywhere.
You can actually go and use your walking up and down the neck exercise and find a note at random.
I'm just going to find one. Well, this is either a Db or a C#. And I can just plug in my patterns:
- Here's natural minor, here's harmonic minor.
Melodic Minor
Now, let's go ahead and look at melodic minor.
Jazz Melodic Minor
The melodic minor we're going to be using is one that is called jazz melodic minor.
Why? Because in classical music, the melodic minor sound is one way going up and another way going down. In classical music, the melodic minor has raised sixth and seventh notes.
So in the case of C, it would be:
- C, D, Eb, F, G, A, B natural, C.
Now if you look at that, that's basically a major scale with one note changed:
- C, D, Eb, F, G, A, B, C.
For a classical melodic minor, what you do is you play that on the way up and natural minor on the way down:
- C, D, Eb, F, G, A, B natural, C
- Back down: C, Bb, Ab, G, F, Eb, D, C.
Why would I do it differently?
Well, once again, just like the harmonic minor, that raised seventh is the cadence, 5i.
That V to I progression, which we'll get into in depth when we look at modal scales and diatonic harmony, is why that's used.
Now, jazz melodic minor just uses the ascending form of this. The jazz melodic minor is used in, well, obviously jazz. It's also used in rock and roll and any sort of other music that is kind of popular styles, non-classical styles. So this is going to be the same going up or coming down.
Once again, on C, it would be:
- C, D, Eb, F, G, A, B, C.
Moving Shapes
Now let me go ahead and play this in some different keys.
Remember, what we can do is start looking at moving these shapes around and getting comfortable with them on the neck. And then you can work with your practice loops.
I'm going to back up and do C melodic minor, G melodic minor, D melodic minor, and A melodic minor.
I think I've tortured you guys enough with flats. We'll go ahead and go into some nice, brighter keys.
This is going to be C melodic minor:
- C, D, Eb, F, G, A, B, C.
Now look at the shape. What I've got to do is I've got to move backwards.
- 1, 3, 4, 1, 3.
- Now I'm going to move back one fret.
- 1, 3, 4.
This is the only one of these minor scales that you have to shift to play.
1, 3, 4, 1, 3, 1, 3, 4, 4, 3, 1, 4, 1, 4, 3, 1.
I actually called 4 1. I played 3 1. You can use 4 1, and that works fine.
If you use 4 1 for the fingering, what that does is it kind of walks your hand down the neck.
If you use 3 1, you have to kind of do the stretch. It's really kind of your choice whether you want to use one or the other.
Playing C Melodic Minor
Okay, so let's go ahead and play these through. I'll count you in.
Once again, we're going to do C melodic minor first. Then we'll go on and do G, D, and A.
Remember, use your fingering patterns.
Here we go: C melodic minor.
1, 2, 3, 4.
- C
- D
- Eb
- F
- G
- A
- B natural
- C.
Back down:
- C
- B natural
- A
- G
- F
- Eb
- D
- C.
Moving to G Melodic Minor
Now let's move on and do G melodic minor.
I'll give you a four count:
1, 2, 3, 4.
- G
- A
- Bb
- C
- D
- E
- F#
- G.
Back down:
- G
- F#
- E
- D
- C
- Bb
- A
- G.
Moving to D Melodic Minor
Okay, let's move on to the D melodic minor.
Once again, I'll count you in:
1, 2, 3, 4.
- D
- E
- F
- G
- A
- B
- C#
- D.
Back down:
- C#
- B
- A
- G
- F
- E
- D.
Finalizing with A Melodic Minor
Let’s do one more. Let's do A melodic minor.
I'll count you in:
1, 2, 3, 4.
- A
- B
- C
- D
- E
- F#
- G#
- A.
Back down:
- A
- G#
- F#
- E
- D
- C
- B
- A.
Once again, what I want you to do is take these fingerings and move them through the rest of the scales.
You can play through all 12 keys using these patterns. This is a lot of information, but remember, you can reduce it down to fingerings.
Putting it All Together
Okay, well we've had that huge, huge theory lesson.
So let's relax and play a tune that we can jam with a band. I think we all need a break after that.
12 Bar Blues
What we're going to do is take all those notes that we learned in the middle of the neck and play a 12 bar blues with it.
Now the trick here is that I'm not going to move my hand out of fifth position. So everything that I play is going to be in the fifth position.
Watch my left hand. It never moves.
Now, what key are we in? That's right. We're in Bb.
- We're up here.
- Here's my I.
- Here's my IV.
- And here's my V.
What we're going to do here is play this through really, really slowly. You can follow along below the screen.
We’re doing some movements on our bass line that are out of just the roots, thirds, and fifths that we've been dealing with earlier.
We're doing a little bit of chromatic passing tones to get from one place to the next.
We'll get into exactly how those work in the jazz walking section. For now, all you need to know is that I'm playing a note out of the scale and I'm moving to a strong chord tone.
So I'm moving to a root, third, or fifth of the next chord, typically a root in this kind of a line.
Playing Slowly
So I'm going to play this very, very slowly.
1, 2, 3.
Let's do that one again.
Remember, you can always use the practice loop on this.
If you notice, my hands never shift, so I'm using all four fingers.
Eighth Notes and Patterns
Now, that's the first half of the line.
Remember those eighth notes that we worked on in the rock and blues lesson from last time?
Well, we're going to use the eighth notes again, and this time we're doing a different kind of a pattern.
It's a little bit more involved.
Remember, we were doing roots, thirds, and fifths?
We're going to add two notes on the top.
We're going to deal with this one in theory world in the next lesson.
This is a flat seven. I’m taking that major seven out of this scale and flattening it.
That just gives you a little bit more of a blues sound.
So I'm playing root, root, three, five, flat seven to five to six to five.
Now, when I call the numbers, remember, that's the scale degrees:
- 1, 1, 3, 5, 7, 5, 6, 5.
This is a pretty common blues line. This is in eighth notes.
So once again, you might want to practice this out of tempo and just get used to the movement.
You notice my hand doesn't move at all.
Let's play it slowly.
Play it with me a couple of times if you need to.
We'll practice with the loop library and then we can take it to the stage.
Band Jam
Here’s the second half:
1, 2, 3, 4, SA.
If you noticed, I was just moving this one pattern around.
Go to the IV chord. Start with my second finger. Go to the V chord. Start with my second finger.
So it's just like all of those scales we were dealing with a little earlier in the book and also in our lesson series in the sense that I can take that fingering and move it around and play the same idea.
It's one of those absolutely essential keys if you're going to be jamming around in blues.
Speeding it Up
Now let's do this. We're going to speed it up a little bit and we'll look at the format of the tune that you're going to be playing with the band.
The format of the tune that you're playing with the band is we're going to do two times through the quarter note walking line and then two times through the eighth note line, and then we'll end.
We're going to do this at a bit of a medium tempo. This will be at 60 beats per minute.
You're going to be significantly faster with the band.
So once again, you'll probably want to work through this with the loop library and just notch it up and notch it up a little bit quicker as you can.
Once again, if this is going to be a little bit difficult to play with the metronome or the click, don't practice with the click.
Just go through carefully, find the notes, and then we can start playing in time after you know where you're going.
Remember, there is a pattern, especially in this second portion of the bass line.
Mid Neck Blues
Okay, here’s 60 beats per minute.
And here's Mid Neck Blues:
1, 2, 3, 4.
SA alright, let’s go and hit the stage and we’ll jam with Brian, Shane, and Tim.
SA Cool. Nice job, guys.
Relax and Stay with the Position
Now remember, when you're playing this one, your hand stays with the first finger on the fifth fret. Fifth position. You don't have to move at all.
Give it a try. SA.
Classical Piece: Bach to Basics
Okay, we're going to kind of kick it up a notch here.
Alright, now it's your turn. Remember to stay relaxed.
This is quite a workout at this tempo. SA.
Well, alright! How'd you do with the band? That's fun, isn't it?
Now, if you have any problems with any of the material, you don't understand a concept or you need a little bit more attention, remember you can always contact me through the community website, and you can communicate with me directly.
I'll be glad to help you out.
Introduction to Classical Music
Okay, now this next thing that we're going to do is we're going to do a little classical piece.
We haven't done any classical music on electric bass, and that's kind of an oddball thing to do on electric bass. This is inspired by a composer named Johann Sebastian Bach.
He's a pretty well-known composer from the 16th century in the Baroque era.
Now, he had a whole lot of influence on different rock and roll bass players in the 60s and 70s, such as Jack Bruce with the legendary band Cream, John Entwistle with The Who, and Chris Squire with the classical rock band Yes.
Those bass lines in Baroque terms are called continuos.
What they consist of is a lot of sequences.
Sequences are a little bit longer patterns than riffs.
We'll get into sequences in detail in the later intermediate to advanced sections when we're exploring modes and pentatonic scales.
Staying in Position
One of the things that we're going to work on in Bach to Basics is staying in one position and playing a melodic sequence.
The melodic sequence is based on the Eb major scale:
- Eb, F, G, Ab, Bb, C, D, Eb.
Let's go back down:
- Eb, D, C, Bb, Ab, G, F, Eb.
Let's keep going:
- D, C, Bb.
Everything's going to be within this one block. We're not going to be moving out of position.
Primarily what we're going to be doing here is playing the sequential idea in the key of Eb and also moving it around to the key of Ab. But it's all going to be within fifth position.
And that was the Ab, and then that's the Eb.
Playing Slowly
Now we're going to take our time and do this very, very slowly.
When you're working on a line in the Baroque style, the one thing that's kind of nice about it is that the rhythms are very, very simple.
So you can take your time and play this quite slowly until you get comfortable with it.
Alright, let's do this.
In 8th note equals 41 and 2 and 3 and 4.
And now remember, your 8th notes are going to be twice as fast:
1 and 2 and 3 and 4 and 1 SA.
Once again, this is one of those tunes that you can practice in free time, just learning the notes, because that's the main event here.
Then you can also gradually increase the tempo.
Ideal Tempo
This is the tempo I like to play this at:
This is quarter note equals 72:
1, 2, 3, 4, damage.
It's going to take you a while to work up to that.
What I would do is just work on it a little bit at a time. Remember, the main thing that helps you here is that your entire piece is in this one little block. So it's all right in the middle of the neck.
This is a great way to learn these notes.
Cool Down Stretch
Okay, well, we’ll go ahead and do a little bit of a stretch and a cool down.
One of the things that I'll sometimes do, especially if I've been sitting for a while or practicing a lot, my tendency is that I'll kind of hunch over the bass and that will give me a lot of back fatigue.
So one of the things I like to do is just put my arms right out in front, bring them back behind.
So I’m just stretching here and I’ll hook behind.
I’m going to turn around so you can see this.
So if you notice, my hands are behind me, I'm kind of clasping them behind my back, and I'm going to open my chest up and bend down.
This is actually something I borrowed from a yoga pose.
And you just stretch out that whole lower back.
That's a good cool down.
And we'll see you at the next lesson.
Take care!
About the instructor
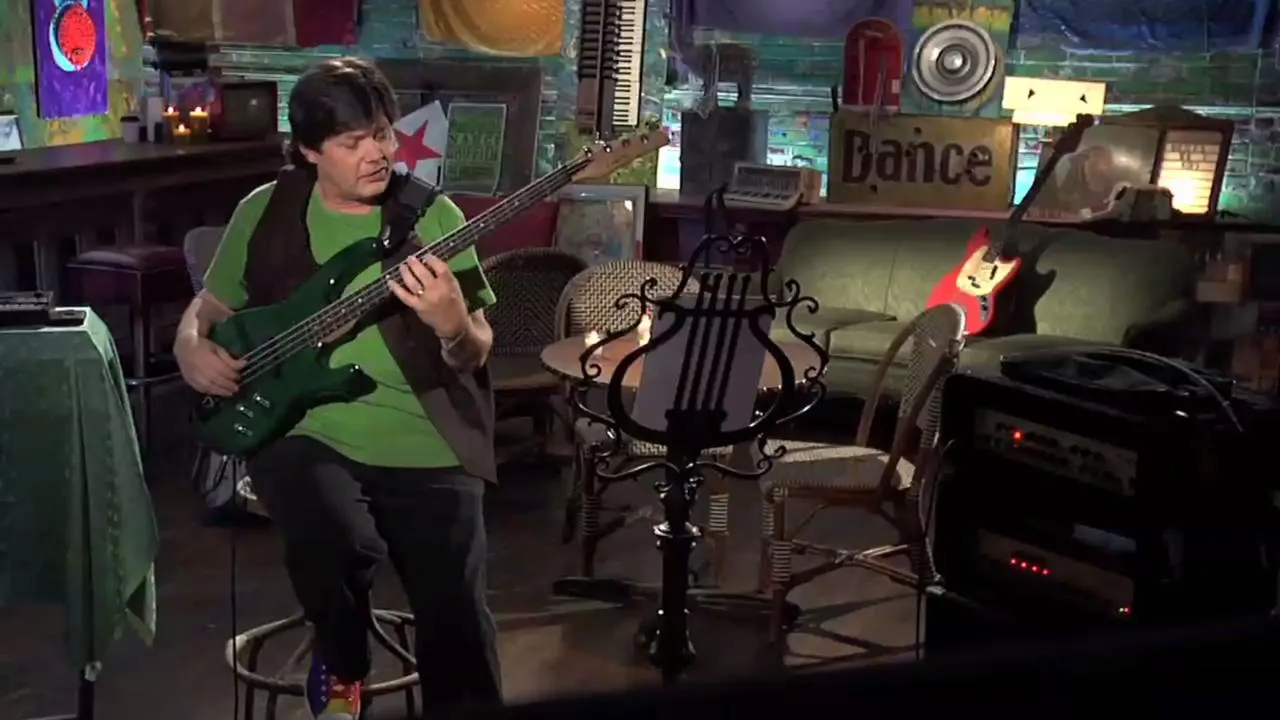
Roy Vogts Karriere umspannt eine außergewöhnliche Bandbreite an Bühnen, von MTVs Headbanger's Ball, dem Montreux Jazz Festival und dem Montreal Jazz Festival bis zum London Palladium, der Grand Ole Opry und dem Kreml. Von Punk bis Funk, von der Schlichtheit von Country und Blues bis zur Komplexität von HyperJazz und World Beat - er hat alles gespielt. Roy war der erste Mensch, der an der renommierten Musikhochschule der University of Miami einen Master in E-Bass-Performance erwarb, und er widmet sich seit über vierzig Jahren der Kunst des Basses. Er war Mentor Dutzender erfolgreicher Profis, darunter der legendäre Willie Weeks. Elektrisch, bundlos, Kontrabass - was auch immer: Wenn es tiefe Töne spielt und Saiten hat, ist Roy ein Meister darin, es zu spielen und anderen beizubringen, dasselbe zu tun. Im Laufe seiner vier Jahrzehnte währenden Karriere hat Roy mit einer erstaunlichen Liste von Topstars aufgenommen oder gespielt, darunter Larry Coryell, Victor Wooten, Dave Weckl, Tom Scott und der LA Express, Chester Thompson, Miroslav Vitous, Glen Campbell, BJ Thomas, Chet Atkins, Engelbert Humperdinck, Dickey Betts, Tony Joe White, Charlie Daniels, Jerry Reed und viele Dutzend mehr. Roy unterrichtet seit dreißig Jahren auf Hochschulniveau. Seit 1983 hat er den Lehrstuhl für Bass an der renommierten Belmont University (Nashville, TN) inne, einer der ganz wenigen Hochschulen, die einen Studiengang in kommerzieller Musik anbieten, der darauf ausgelegt ist, Studierende zu professionellen Musikern an der Spitze der Branche zu machen. Roys Studenten sind mit namhaften Stars wie Trisha Yearwood, Faith Hill, Little Texas, Michael W. Smith, Lady Antebellum, Chick Corea, Sir Tom Jones, Blood Sweat and Tears, Yanni und unzähligen weiteren Musikikonen getourt und haben mit ihnen aufgenommen. Seine Serie Teach Me Bass Guitar bringt dir genau diesen Ansatz auf Hochschulniveau nahe und führt dich vom Schnellstart für absolute Anfänger (Vol. 1) über Rhythmusgrundlagen (Vol. 2), das Finden deines eigenen Stils (Vol. 3) und ernsthafte Musikalität (Vol. 4) bis hin zu einem Werkzeugkasten für Profispieler (Vol. 5), damit du Schritt für Schritt echte Fähigkeiten aufbaust. read more